> ## Documentation Index
> Fetch the complete documentation index at: https://docs.scanova.io/llms.txt
> Use this file to discover all available pages before exploring further.
# Email reports
> Receiving analytics via scheduled email reports.
**Email Reports** (`/analytics/email-report`) sets up **recurring** scan-analytics reports delivered automatically by email (or Slack) on a schedule you define — daily, weekly, or monthly. This is different from [Reports](/analytics/reports), which generates a single, one-off report on demand. Use Email Reports when you want a standing digest; use Reports when you want a specific export right now.
Email Reports is only shown in the sidebar for accounts with export permission (Pro plans and above). Each account can create up to 5 email reports.
 ## Setting up a scheduled report
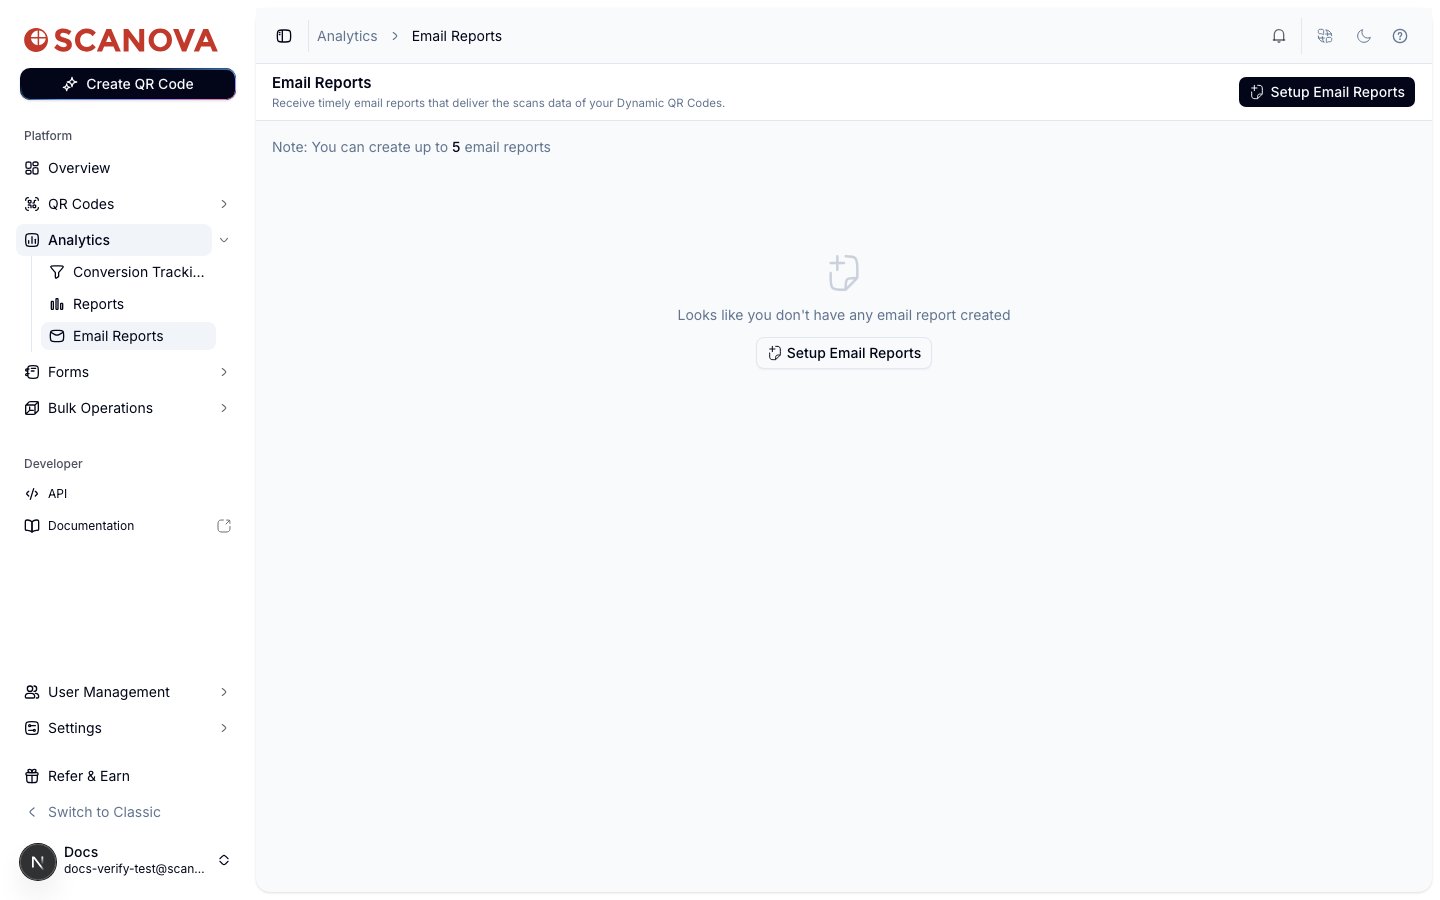
From **Analytics > Email Reports**, select **Setup Email Reports**.
## Setting up a scheduled report
From **Analytics > Email Reports**, select **Setup Email Reports**.
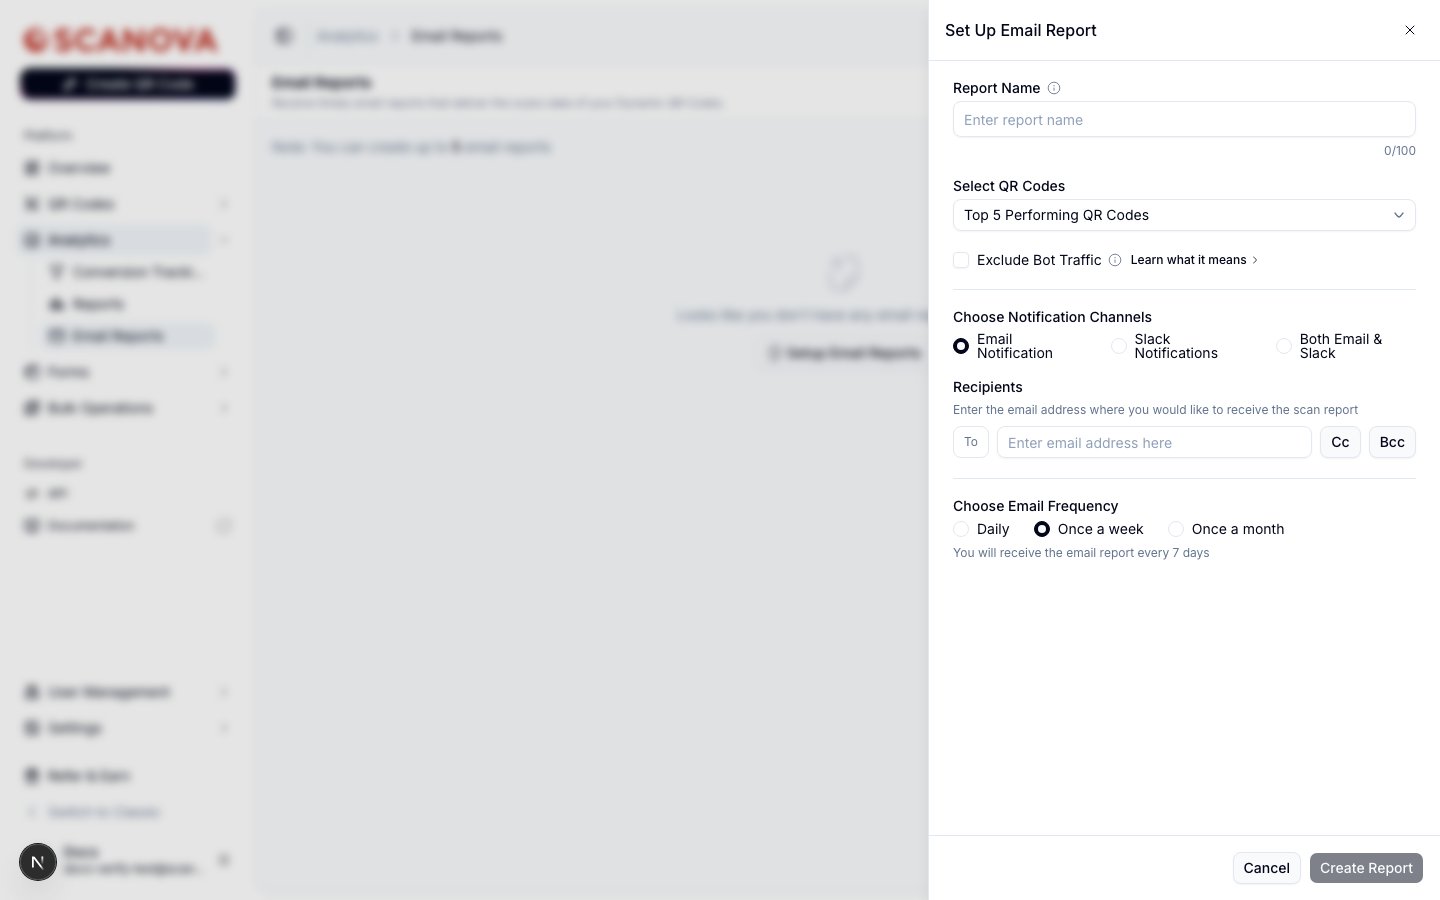 Enter a name in **Report Name** (up to 100 characters) so you can identify it later in the list.
Under **Select QR Codes**, choose **Top 5 Performing QR Codes**, **Top 10 Performing QR Codes**, or **Custom** to pick specific codes yourself. Optionally check **Exclude Bot Traffic** to filter out non-human scans.
Under **Choose Notification Channels**, select **Email Notification**, **Slack Notifications**, or **Both Email & Slack**. Selecting a Slack-based option checks your workspace's Slack connection status before you can proceed — connect Slack under Integrations first if you plan to use it.
Under **Recipients**, enter at least one email address in the **To** field. Select **Cc** or **Bcc** to reveal additional recipient fields if you need to loop in more people without them being primary recipients.
Under **Choose Email Frequency**, choose **Daily**, **Once a week**, or **Once a month**. A helper line below confirms the cadence in plain language (for example, "You will receive the email report every 7 days" for weekly).
Select **Create Report**. A confirmation toast appears, and the new schedule is added to the list on the Email Reports page.
After creating a report, reload the page if the list doesn't immediately show your new entry — during verification the list stayed on its empty state until a full page refresh, even though the report had been created successfully in the background.
## Managing existing schedules
The Email Reports table lists each schedule's name, QR code selection, recipient count, frequency, and creator. Use the **Action** column to edit a schedule (pencil icon) or delete it (trash icon) — deleting prompts a confirmation dialog before removing it.
## Where to go next
* [Reports](/analytics/reports) — for a one-off report generated on demand instead of a recurring schedule.
* [Analytics dashboard](/analytics/dashboard) — the live view this data is drawn from.
## Related
* [Reports](/analytics/reports) — the one-off counterpart to this recurring schedule.
* [Analytics dashboard](/analytics/dashboard) — the live view these scheduled reports summarize.
* [Slack](/integrations/slack) — connect your workspace here before choosing Slack as a notification channel above.
Enter a name in **Report Name** (up to 100 characters) so you can identify it later in the list.
Under **Select QR Codes**, choose **Top 5 Performing QR Codes**, **Top 10 Performing QR Codes**, or **Custom** to pick specific codes yourself. Optionally check **Exclude Bot Traffic** to filter out non-human scans.
Under **Choose Notification Channels**, select **Email Notification**, **Slack Notifications**, or **Both Email & Slack**. Selecting a Slack-based option checks your workspace's Slack connection status before you can proceed — connect Slack under Integrations first if you plan to use it.
Under **Recipients**, enter at least one email address in the **To** field. Select **Cc** or **Bcc** to reveal additional recipient fields if you need to loop in more people without them being primary recipients.
Under **Choose Email Frequency**, choose **Daily**, **Once a week**, or **Once a month**. A helper line below confirms the cadence in plain language (for example, "You will receive the email report every 7 days" for weekly).
Select **Create Report**. A confirmation toast appears, and the new schedule is added to the list on the Email Reports page.
After creating a report, reload the page if the list doesn't immediately show your new entry — during verification the list stayed on its empty state until a full page refresh, even though the report had been created successfully in the background.
## Managing existing schedules
The Email Reports table lists each schedule's name, QR code selection, recipient count, frequency, and creator. Use the **Action** column to edit a schedule (pencil icon) or delete it (trash icon) — deleting prompts a confirmation dialog before removing it.
## Where to go next
* [Reports](/analytics/reports) — for a one-off report generated on demand instead of a recurring schedule.
* [Analytics dashboard](/analytics/dashboard) — the live view this data is drawn from.
## Related
* [Reports](/analytics/reports) — the one-off counterpart to this recurring schedule.
* [Analytics dashboard](/analytics/dashboard) — the live view these scheduled reports summarize.
* [Slack](/integrations/slack) — connect your workspace here before choosing Slack as a notification channel above.