> ## Documentation Index
> Fetch the complete documentation index at: https://docs.scanova.io/llms.txt
> Use this file to discover all available pages before exploring further.
# Passkeys
> Sign in with a passkey instead of a password.
A passkey lets you complete sign-in with your device's fingerprint, face unlock, or screen lock instead of typing a code. It's one of three methods available inside the same **Manage MFA** drawer — alongside email one-time codes and an authenticator app.
This page covers the passkey method specifically. For email and authenticator-app setup, how to set a default method, and backup codes, see [Multi-factor authentication](/authentication/multi-factor-authentication).
## Adding a passkey
Open **Account** → **Login & Security** → the edit icon on **Multi-Factor Authentication**, then choose **Passkey** from the method list (it's listed first, flagged **Recommended for this device**, if your browser detects a built-in authenticator).
Enter your current password to verify it's you before creating the passkey.
 Your browser opens its native passkey-creation dialog (Touch ID, Windows Hello, a security key, or your phone's screen lock, depending on your device and browser). This step happens outside the Scanova UI — it's controlled by your operating system or browser.
Once your device confirms the passkey, Scanova asks you to give it a recognizable name (useful if you register passkeys from more than one device).
Your browser opens its native passkey-creation dialog (Touch ID, Windows Hello, a security key, or your phone's screen lock, depending on your device and browser). This step happens outside the Scanova UI — it's controlled by your operating system or browser.
Once your device confirms the passkey, Scanova asks you to give it a recognizable name (useful if you register passkeys from more than one device).
 Select **Save** to finish. You'll then see your [backup codes](/authentication/multi-factor-authentication#saving-backup-codes) if this is your first MFA method.
This walkthrough was verified against the live app using Chrome's built-in virtual-authenticator testing tool, since no physical security key or platform authenticator (Touch ID, Windows Hello, and similar) was available in the verification environment. The "name your passkey" screen shown above is the same one you'll see after your own device's real passkey prompt succeeds — only the device prompt itself (step 2) differs from what an end user with real hardware sees, and Scanova's UI has no visibility into that native dialog either way.
## Signing in with a passkey
If a passkey is your default MFA method, signing in with your password takes you to a **Security check** screen prompting you to use it:
Select **Save** to finish. You'll then see your [backup codes](/authentication/multi-factor-authentication#saving-backup-codes) if this is your first MFA method.
This walkthrough was verified against the live app using Chrome's built-in virtual-authenticator testing tool, since no physical security key or platform authenticator (Touch ID, Windows Hello, and similar) was available in the verification environment. The "name your passkey" screen shown above is the same one you'll see after your own device's real passkey prompt succeeds — only the device prompt itself (step 2) differs from what an end user with real hardware sees, and Scanova's UI has no visibility into that native dialog either way.
## Signing in with a passkey
If a passkey is your default MFA method, signing in with your password takes you to a **Security check** screen prompting you to use it:
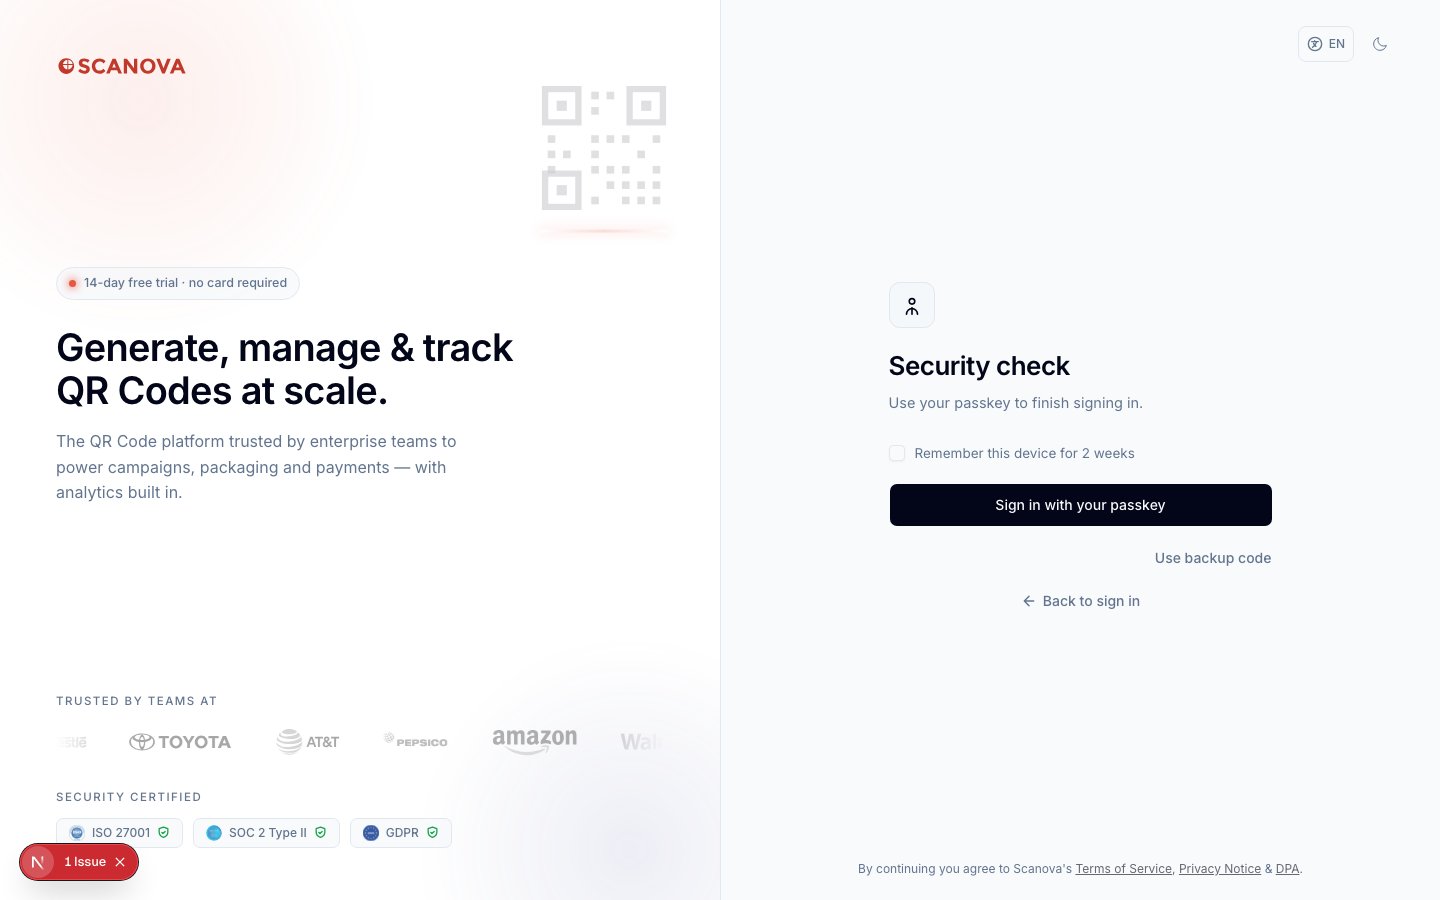 Select **Sign in with your passkey** to trigger your device's native prompt. Check **Remember this device for 2 weeks** first if you don't want to repeat this step on the same browser for a while. If your passkey isn't available (different device, lost hardware key, and so on), select **Use backup code** to fall back to one of your saved recovery codes.
## Removing a passkey
From the MFA status view, select the trash icon next to the passkey, confirm your password (or re-authenticate with Google on password-less accounts), and it's removed immediately. If it was your only MFA method, MFA is turned off for your account.
## Related
* [Multi-factor authentication](/authentication/multi-factor-authentication) — the full MFA drawer, including email codes, authenticator apps, default methods, and backup codes.
* [Google login](/authentication/google-login) — how Google sign-in stands in for your password when your account has none set.
Select **Sign in with your passkey** to trigger your device's native prompt. Check **Remember this device for 2 weeks** first if you don't want to repeat this step on the same browser for a while. If your passkey isn't available (different device, lost hardware key, and so on), select **Use backup code** to fall back to one of your saved recovery codes.
## Removing a passkey
From the MFA status view, select the trash icon next to the passkey, confirm your password (or re-authenticate with Google on password-less accounts), and it's removed immediately. If it was your only MFA method, MFA is turned off for your account.
## Related
* [Multi-factor authentication](/authentication/multi-factor-authentication) — the full MFA drawer, including email codes, authenticator apps, default methods, and backup codes.
* [Google login](/authentication/google-login) — how Google sign-in stands in for your password when your account has none set.