> ## Documentation Index
> Fetch the complete documentation index at: https://docs.scanova.io/llms.txt
> Use this file to discover all available pages before exploring further.
# First-run onboarding wizard
> The 4-step wizard shown to brand-new account owners at /onboarding.
The first time a new account owner logs in, Scanova redirects them into a 4-step wizard at `/onboarding` before they ever see the main dashboard — its whole purpose is to get one QR code created before you're left to explore on your own.
This page's redirect trigger (`first_login`) is per-account and only ever true once, so it couldn't be re-triggered live on the shared test account used to verify the rest of this documentation project — that account had already completed its first login long before this page was written. Every step below **was verified live** by navigating directly to `/onboarding` (the route itself has no additional gate beyond being logged in) and completing the flow start to finish; only the automatic redirect-on-first-login behavior itself is documented from source rather than observed.
## Who sees this, and why
Per the app's own routing logic (`lib/next-path.ts`), the wizard only applies to a genuinely new **account owner** — a teammate accepting a shared-user invitation trips the same underlying `first_login` flag on their first login too, but is deliberately exempted, since the wizard assumes permissions (like creating a QR code) that a Viewer or other restricted role may not hold. A newly-invited teammate goes straight to the dashboard instead.
If profile completion is still outstanding, that gate takes priority — the wizard only appears after your profile is complete.
## Step 1 — Choose
The wizard opens on a personalized welcome ("Welcome, \{name}! Let's create your first QR Code.") with three starting points, matching the same three options available everywhere else in the app (see [Quick Code vs. full Page](/qr-codes/create/quick-code-vs-page)):
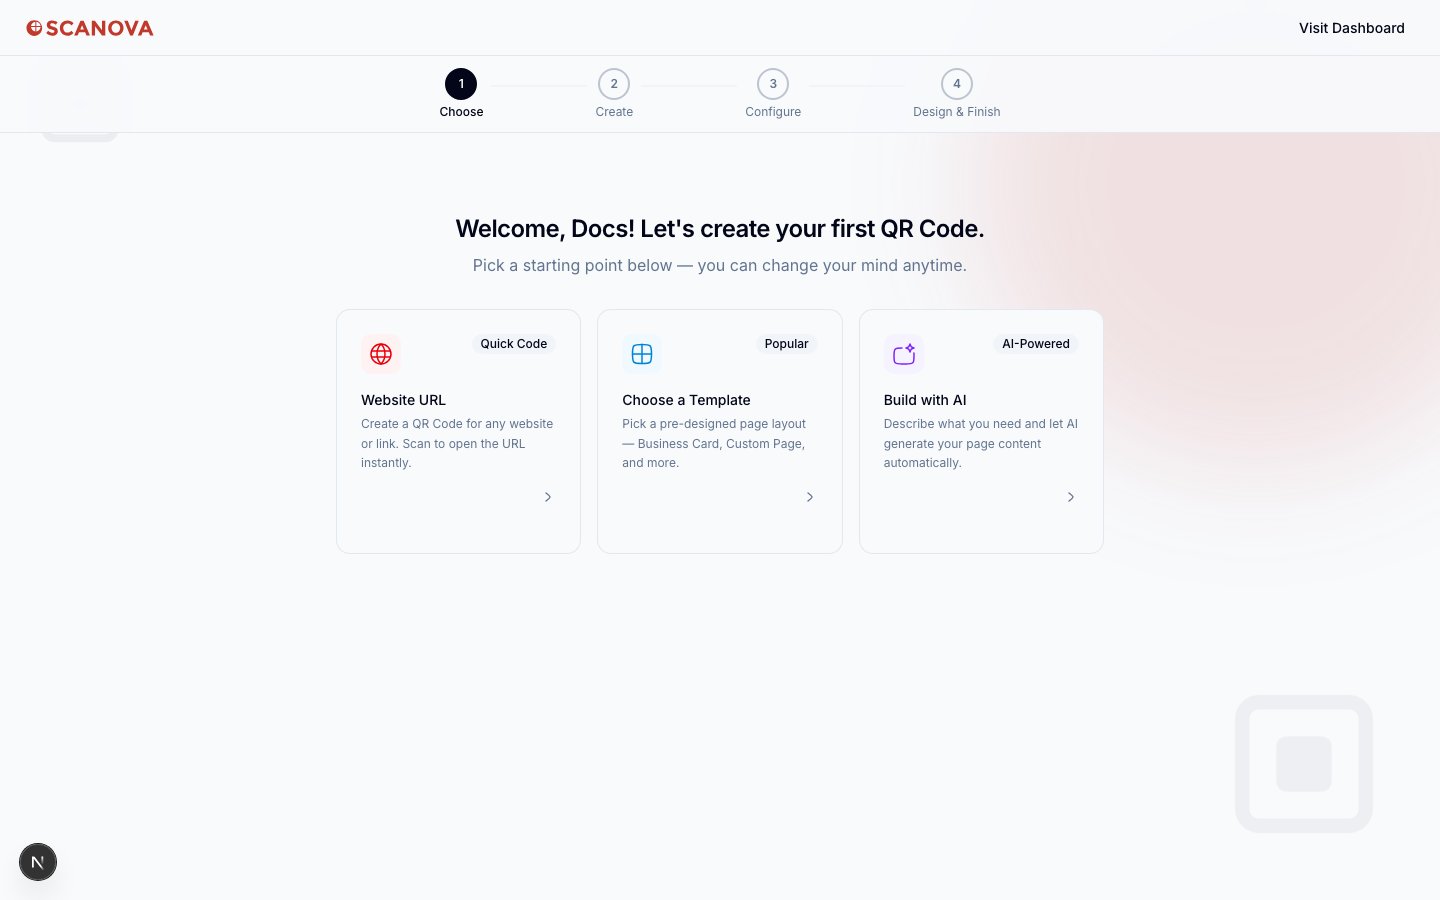 * **Quick Code** — a direct-action QR code, e.g. **Website URL**.
* **Choose a Template** (labeled **Popular**) — a pre-designed page layout (Business Card, Custom Page, and more).
* **Build with AI** (labeled **AI-Powered**) — describe what you need and let AI generate the page content.
A top progress indicator (**1 Choose → 2 Create → 3 Configure → 4 Design & Finish**) tracks your position throughout, and a **Visit Dashboard** link in the top right lets you skip the wizard entirely at any point.
## Step 2 — Create
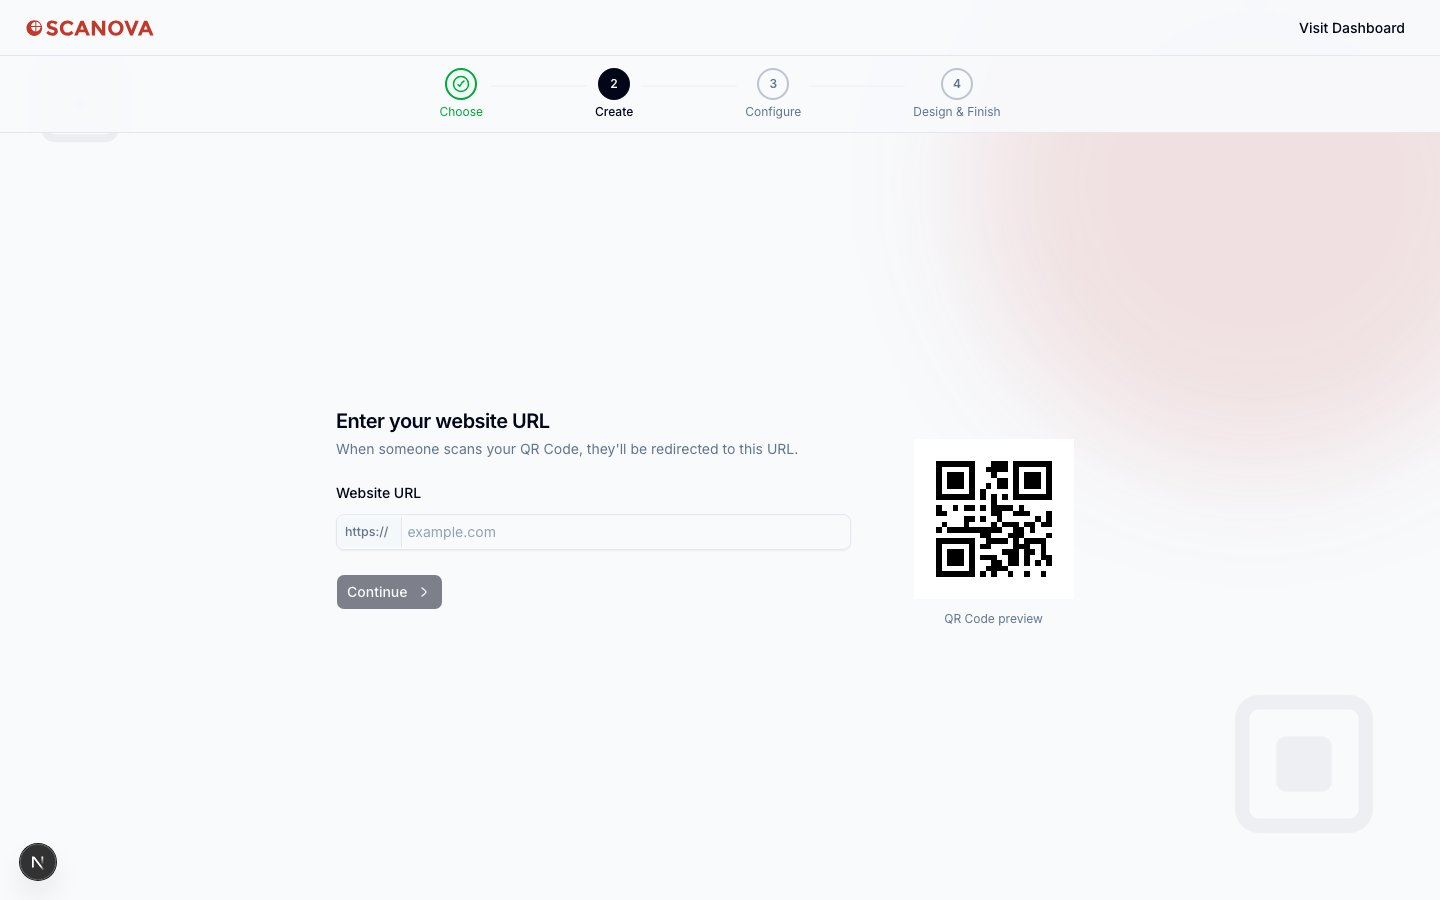
Selecting a starting point opens its type-specific creation form. For **Website URL** (the path verified here), this is a single field asking for the destination URL, with a live QR code preview rendering on the right as you type:
* **Quick Code** — a direct-action QR code, e.g. **Website URL**.
* **Choose a Template** (labeled **Popular**) — a pre-designed page layout (Business Card, Custom Page, and more).
* **Build with AI** (labeled **AI-Powered**) — describe what you need and let AI generate the page content.
A top progress indicator (**1 Choose → 2 Create → 3 Configure → 4 Design & Finish**) tracks your position throughout, and a **Visit Dashboard** link in the top right lets you skip the wizard entirely at any point.
## Step 2 — Create
Selecting a starting point opens its type-specific creation form. For **Website URL** (the path verified here), this is a single field asking for the destination URL, with a live QR code preview rendering on the right as you type:
 ## Step 3 — Configure
Next, name the QR code and choose its short URL:
## Step 3 — Configure
Next, name the QR code and choose its short URL:
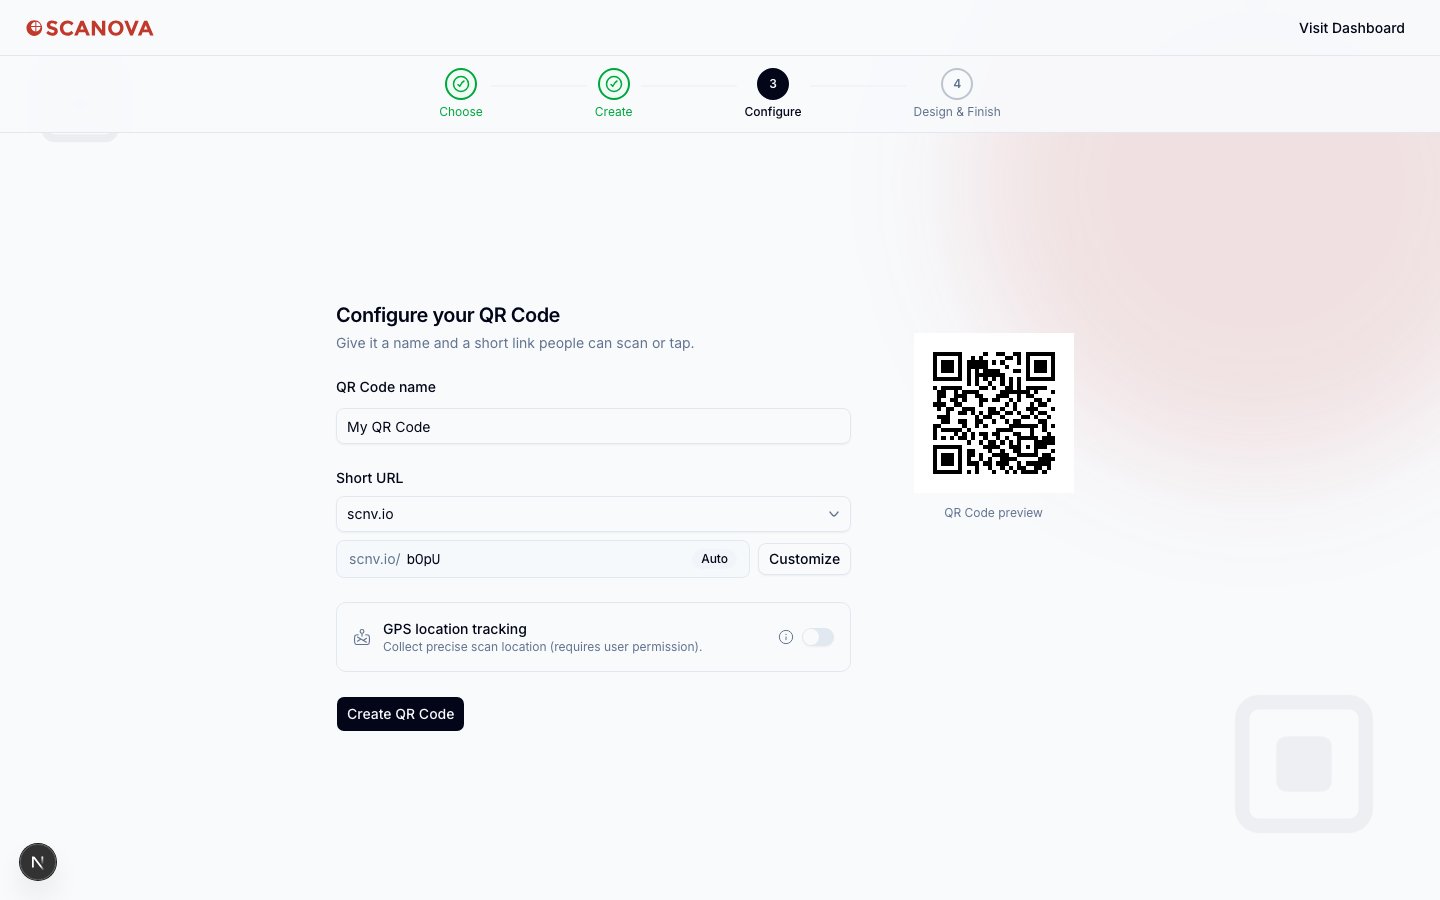 * **QR Code name** — defaults to "My QR Code" if left blank.
* **Short URL** — defaults to `scnv.io` with an auto-generated slug; select **Customize** to pick your own.
* **GPS location tracking** — an optional toggle to collect precise scan location (requires the visitor's permission at scan time).
Selecting **Create QR Code** shows a brief "Generating your QR Code…" state, then advances to the final step.
## Step 4 — Design & Finish
The last step confirms success with a celebratory confetti animation and your finished, scannable QR code:
* **QR Code name** — defaults to "My QR Code" if left blank.
* **Short URL** — defaults to `scnv.io` with an auto-generated slug; select **Customize** to pick your own.
* **GPS location tracking** — an optional toggle to collect precise scan location (requires the visitor's permission at scan time).
Selecting **Create QR Code** shows a brief "Generating your QR Code…" state, then advances to the final step.
## Step 4 — Design & Finish
The last step confirms success with a celebratory confetti animation and your finished, scannable QR code:
![Onboarding wizard step 4, Design and Finish, showing a confetti animation, the heading 'Congratulations, [name]! Your QR Code is ready.', an optional design picker, a real QR code image, Test your QR and Download QR buttons, and a Continue to plans button](https://mintcdn.com/scanova-api/q8t3kzcRTgAP7jV0/images/v2/onboarding/first-run-wizard/step4-design-finish.png?fit=max&auto=format&n=q8t3kzcRTgAP7jV0&q=85&s=71d528ac836ea23c06ab8558e9447cd6) From here:
* **Choose a design (optional)** — apply a visual style before downloading.
* **Test your QR** — opens the destination in a new tab, the same way a scan would.
* **Download QR** — downloads the QR code image.
* **Continue to plans** — the final action, which moves you into the main app (a note on-screen reminds you the design can also be changed later from the dashboard).
## Related
* [Quick Code vs. full Page](/qr-codes/create/quick-code-vs-page) — the same three starting points, available at any time from `/qr/create`, not just during onboarding.
* [Classic to New UI](/onboarding/classic-to-new-ui) — a separate, one-time account-level decision, unrelated to this wizard.
From here:
* **Choose a design (optional)** — apply a visual style before downloading.
* **Test your QR** — opens the destination in a new tab, the same way a scan would.
* **Download QR** — downloads the QR code image.
* **Continue to plans** — the final action, which moves you into the main app (a note on-screen reminds you the design can also be changed later from the dashboard).
## Related
* [Quick Code vs. full Page](/qr-codes/create/quick-code-vs-page) — the same three starting points, available at any time from `/qr/create`, not just during onboarding.
* [Classic to New UI](/onboarding/classic-to-new-ui) — a separate, one-time account-level decision, unrelated to this wizard.