> ## Documentation Index
> Fetch the complete documentation index at: https://docs.scanova.io/llms.txt
> Use this file to discover all available pages before exploring further.
# UTM builder
> Add UTM parameters to a Dynamic QR Code's destination so that scans arrive tagged in your analytics tool, and the traffic can be attributed correctly.
## What the UTM builder does
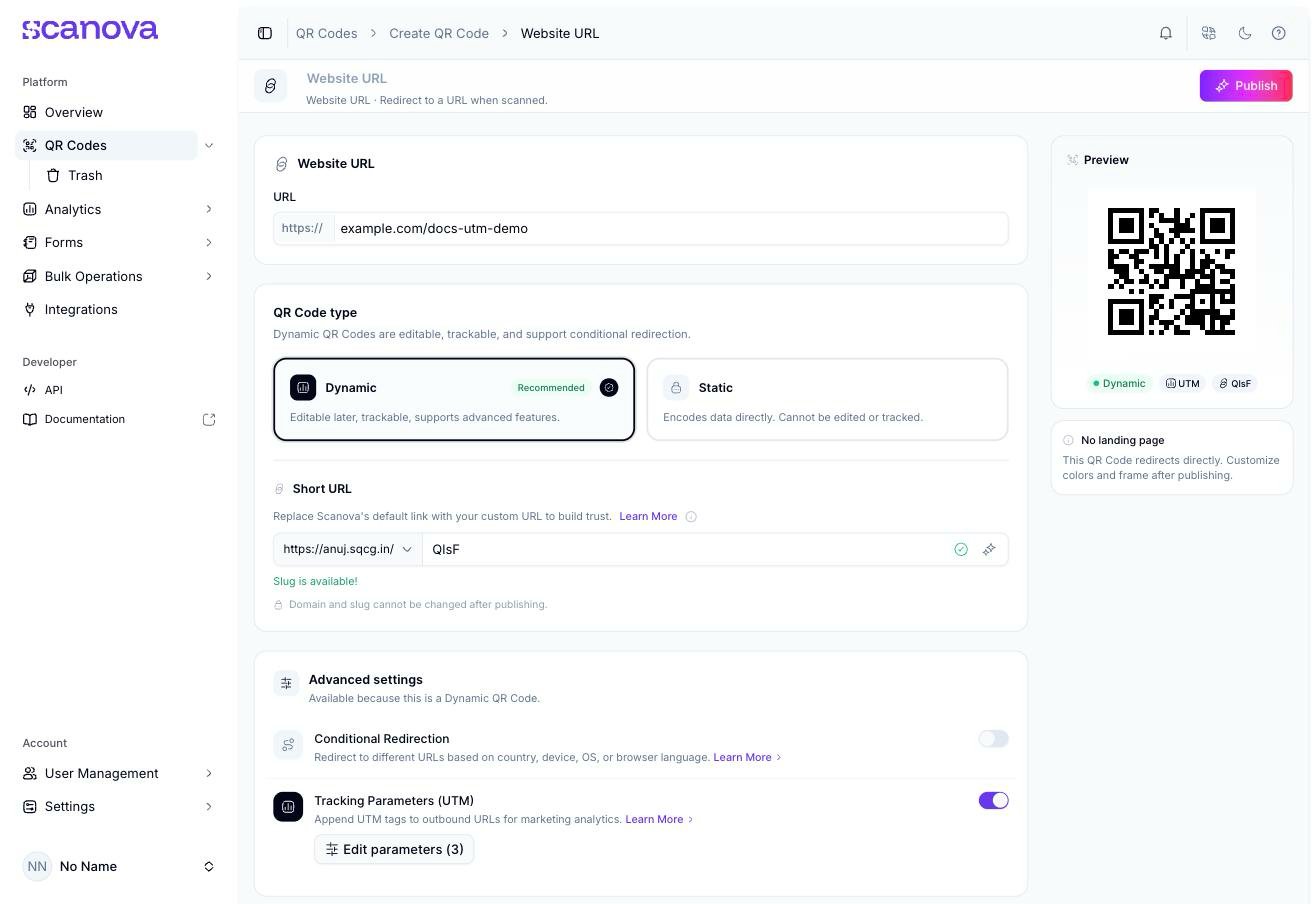
The UTM builder appends standard UTM tracking parameters to a Dynamic QR Code's outbound URL, so a scan shows up correctly attributed in an external analytics tool (like Google Analytics) rather than as an anonymous visit. It's the **Tracking Parameters (UTM)** toggle under **Advanced settings** on any Dynamic Quick Code form (for example, [Website URL](/qr-codes/create/website-url) or [Google Maps](/qr-codes/create/google-maps)), next to **Conditional Redirection**.
UTM builder is only available on **Dynamic** QR Codes with an outbound destination URL — it doesn't apply to Static QR Codes or to categories with no external redirect.
## Adding tracking parameters
On the QR Code's create (or edit) form, under **Advanced settings**, switch on **Tracking Parameters (UTM)** — "Append UTM tags to outbound URLs for marketing analytics." A **Configure parameters** button appears, along with a warning that nothing happens until at least one parameter is added: "Add at least one parameter, or turn this off — it won't do anything until then."
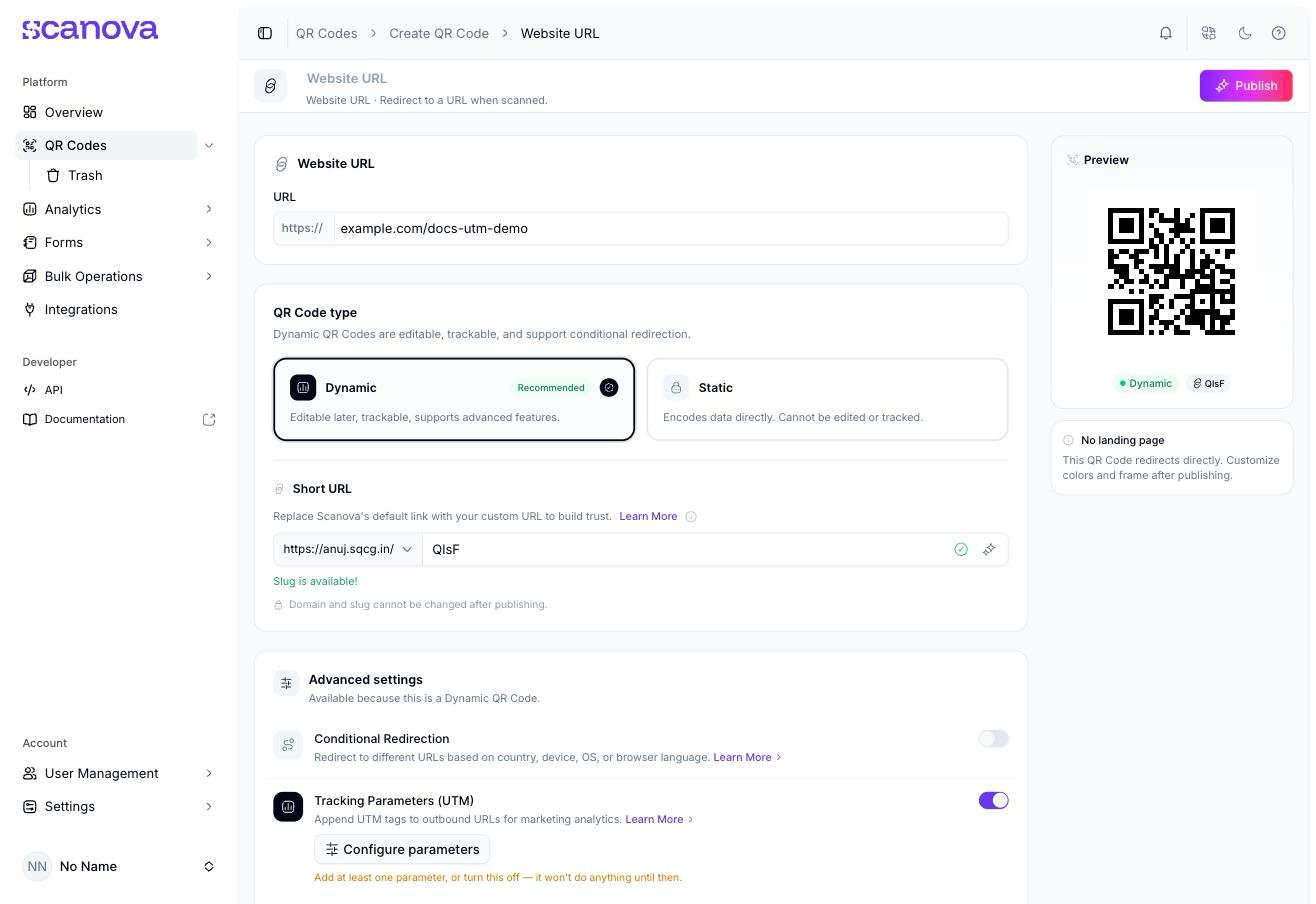 Click **Configure parameters**. The dialog shows a live **URL preview** of the destination URL with a running character count (max 2000), five standard UTM fields — **utm\_campaign**, **utm\_medium**, **utm\_source**, **utm\_term**, **utm\_content** — each with its own hint and example (e.g. `utm_source` — "Identify the source of traffic (e.g. Facebook, LinkedIn, poster\_qr, newsletter)"), and a **Custom parameters** section for anything outside the standard five.
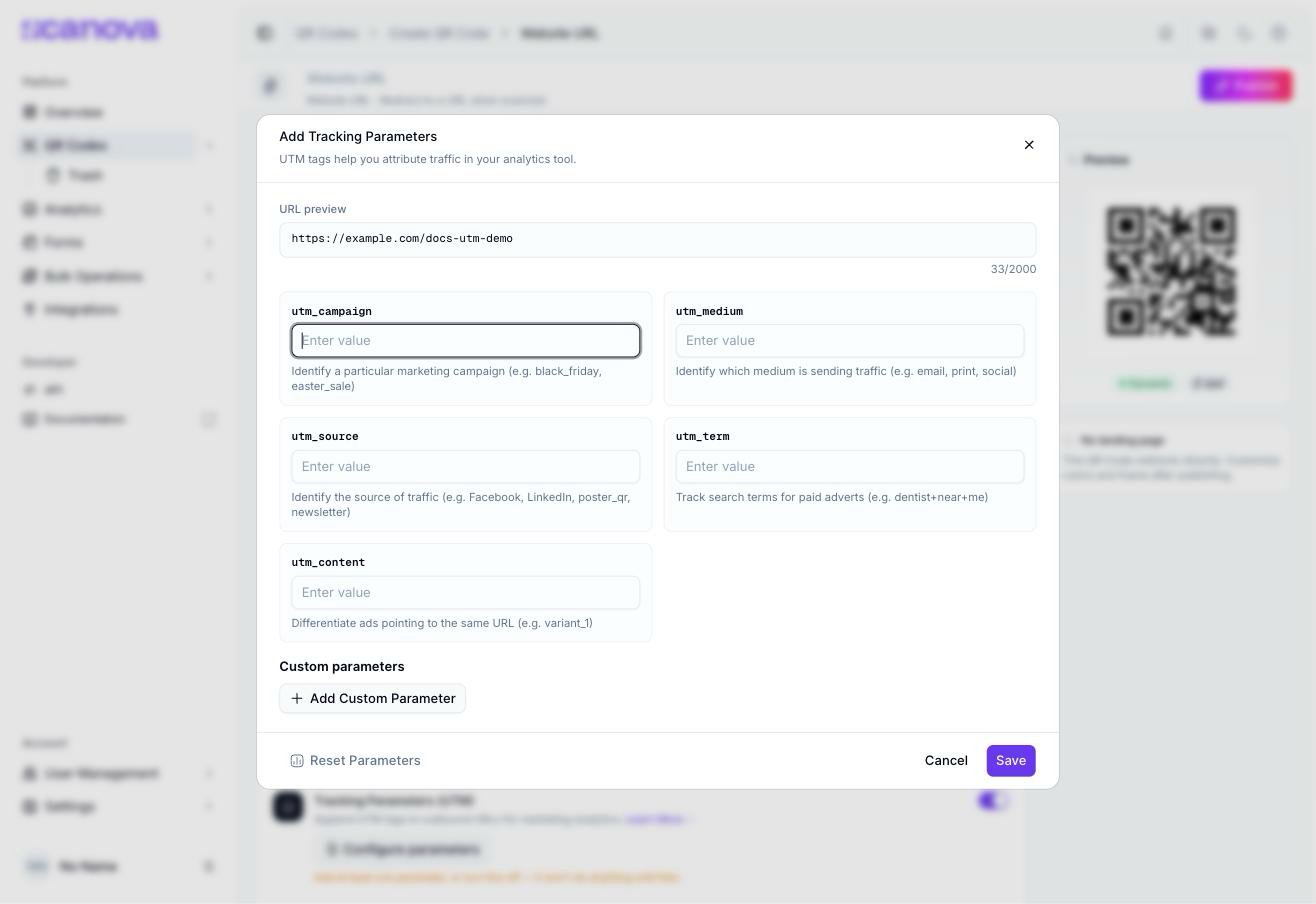 Type into any of the standard fields — the **URL preview** at the top updates live as query parameters, e.g. `?utm_source=poster_qr&utm_medium=print&utm_campaign=summer_sale`. You don't need to fill in all five.
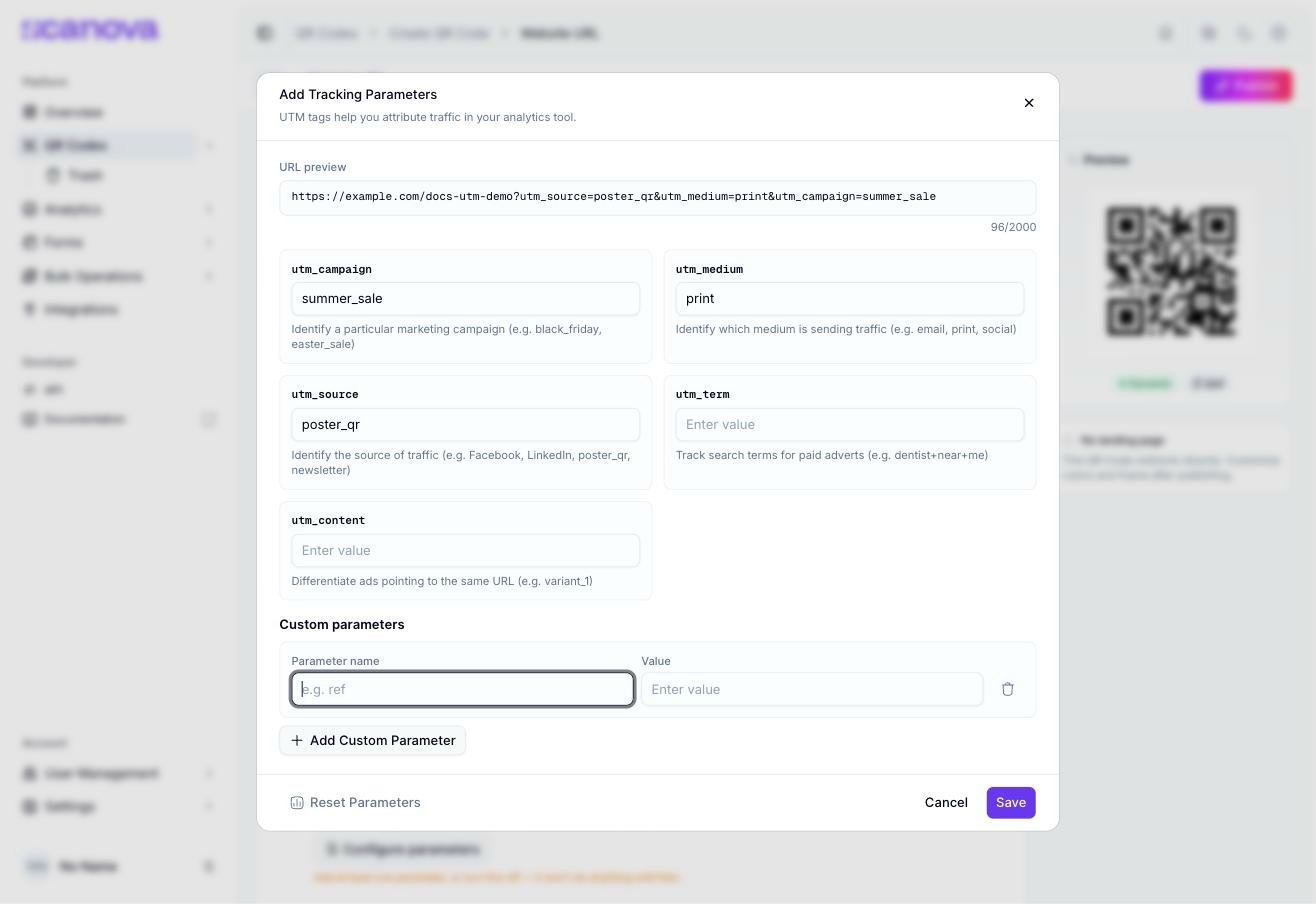
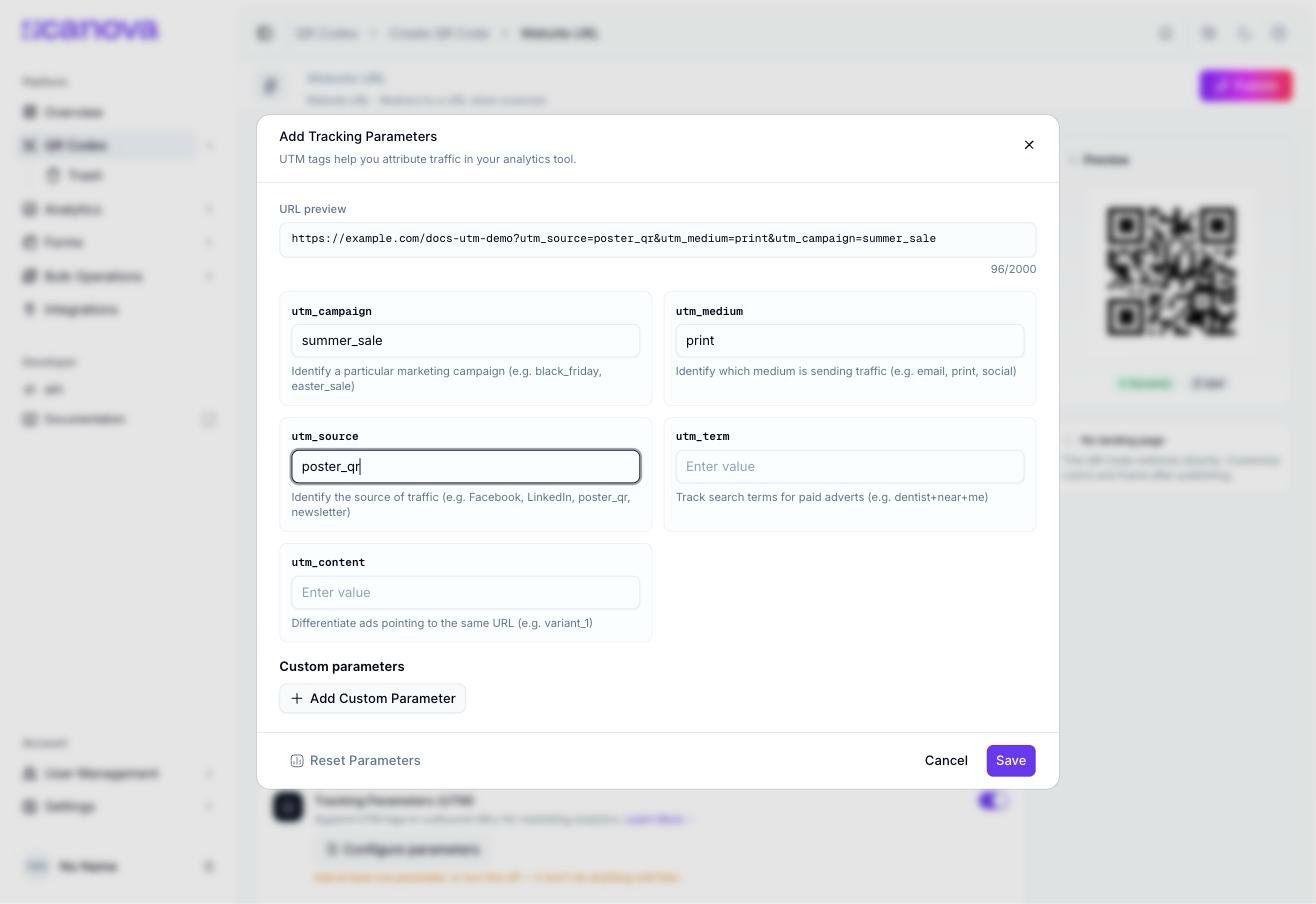 Click **Add Custom Parameter** to add a **Parameter name** / **Value** pair for anything not covered by the standard five (placeholder example: `ref`). Each custom row has its own delete (trash) icon.
 Click **Save**. The **Configure parameters** button is replaced with **Edit parameters (N)**, where N is the number of parameters set, and the QR Code's preview panel gains a **UTM** badge alongside its Dynamic/category badges.
 Use **Reset Parameters** in the dialog to clear every field at once, or **Cancel** to discard unsaved changes.
## Related
* [Website URL QR Code](/qr-codes/create/website-url) — the most common place to attach UTM parameters, alongside Conditional Redirection
* [Conditional redirection](/qr-codes/manage/conditional-redirection) — the other Advanced setting in the same section, routing by who's scanning rather than tagging the destination
* [Exporting QR Code data](/qr-codes/manage/export) — pull scan data to cross-reference against what your analytics tool attributes from these UTM tags
Use **Reset Parameters** in the dialog to clear every field at once, or **Cancel** to discard unsaved changes.
## Related
* [Website URL QR Code](/qr-codes/create/website-url) — the most common place to attach UTM parameters, alongside Conditional Redirection
* [Conditional redirection](/qr-codes/manage/conditional-redirection) — the other Advanced setting in the same section, routing by who's scanning rather than tagging the destination
* [Exporting QR Code data](/qr-codes/manage/export) — pull scan data to cross-reference against what your analytics tool attributes from these UTM tags