

Prerequisite
Your account needs the MCP integration enabled — see Access requirements. If the Integrations → Model Context Protocol card shows Upgrade instead of Connect, the rest of this page won’t apply yet.Step 1: Open the MCP integration
From the dashboard, go to Integrations and click the Model Context Protocol card. This opens a setup panel showing your Scanova MCP server URL: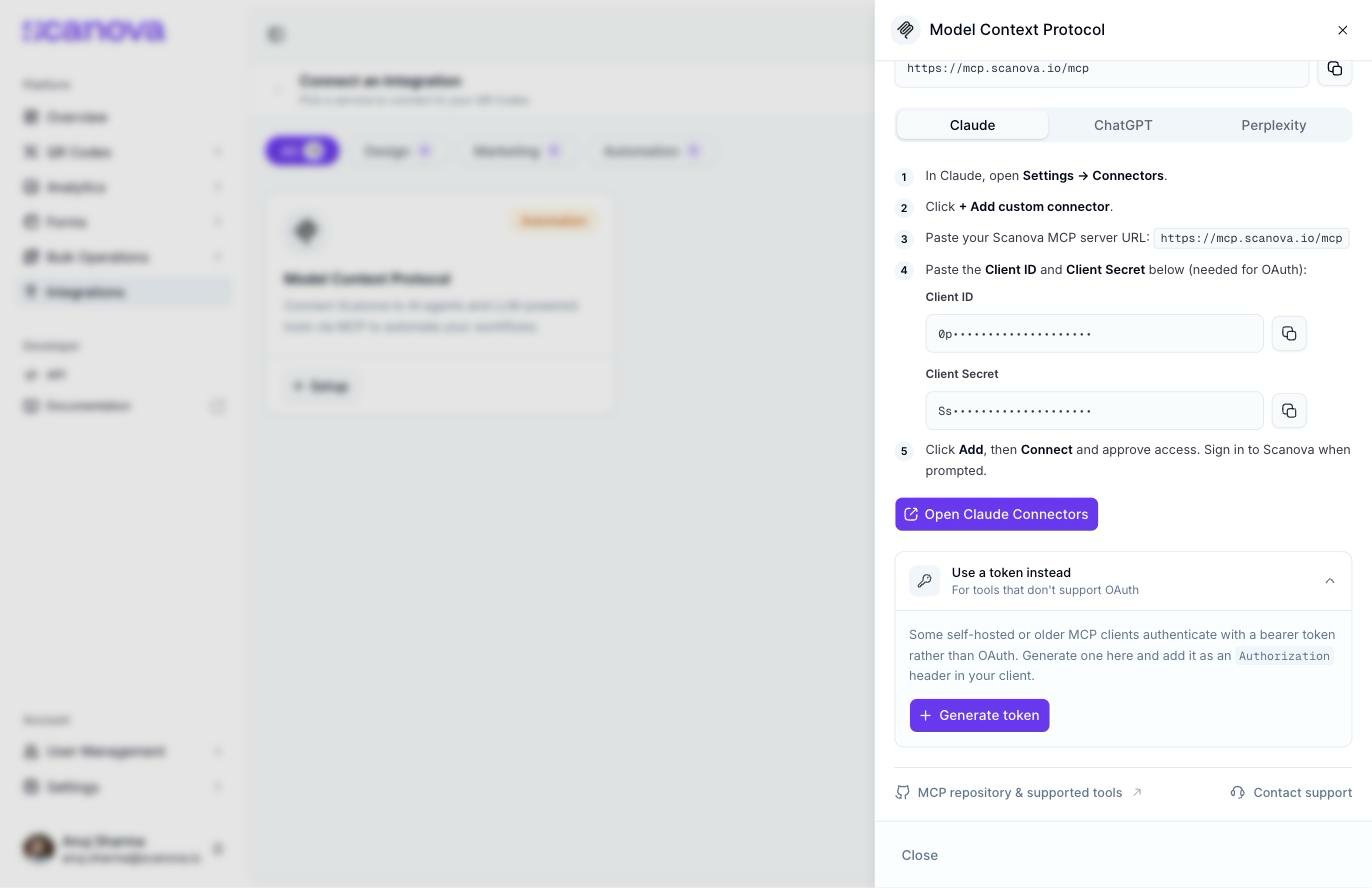
The MCP setup panel's Claude tab, with the server URL, numbered steps, Client ID/Secret fields, and the Open Claude Connectors shortcut
Option A: OAuth-native clients (Claude, ChatGPT, Perplexity)
The panel has a tab per client, each with its own numbered steps and a Client ID / Client Secret pair shown inline. Copy both from the panel itself — they are not reproduced here. You then complete an OAuth sign-in and approve access to your Scanova account.- Claude
- ChatGPT
- Perplexity
1
Open Connectors settings
In Claude, open Settings → Connectors.
2
Add a custom connector
Click + Add custom connector.
3
Paste the server URL
Paste
https://mcp.scanova.io/mcp from the panel.4
Paste the OAuth credentials
Paste the Client ID and Client Secret shown in the panel’s Claude tab.
5
Connect and authorize
Click Add, then Connect, and approve access. Sign in to Scanova when prompted.
Option B: Config-file clients (Cursor, VS Code, Claude Desktop, or anything else)
For MCP clients that don’t have a native OAuth connector UI — they take a JSON config file instead — expand Use a token instead at the bottom of the panel. This generates a Scanova Management API key withenvironment=mcp, the same token type described in Creating & managing API keys. Click Generate token, then copy the value shown (masked in the panel; copy button reveals the full value to your clipboard).
Add it to your client’s MCP config as the Authorization header value — this is the exact format documented in the server’s own README:
Revoking access
Token clients: back in the panel’s expanded Use a token instead section, click the trash icon next to the token and confirm. This immediately disables every MCP client using that token. OAuth clients (Claude/ChatGPT/Perplexity): remove the connector from that AI tool’s own connector/settings list — it uses a standard OAuth access token issued to that specific client, independent of the token fallback above.Troubleshooting
- “Invalid token” / tool calls failing with a 401 — the token was revoked or has expired. Generate a new one and update your client’s config.
- Tool not found after adding the server — restart your IDE or client; most MCP clients only fetch the tool list once, at startup or connection time
- Connection errors — double check the URL is exactly
https://mcp.scanova.io/mcp(not/healthor the bare origin) and that your network can reach it
Next step
See Available tools for everything your AI assistant can now do.Related
- MCP overview — what the server does, access requirements, and the
INTEGRATION_MCPquota gate - Available tools — every tool available once you are connected
- Creating & managing API keys — the same key type the token-fallback option here generates, with
environment=mcp - Management API overview — the raw-key auth scheme the token fallback authenticates against