Scheduling recurring scan analytics digests by email or Slack: choosing QR Codes, picking recipients, and setting a daily, weekly or monthly frequency.
Email Reports (/analytics/email-report) sets up recurring scan-analytics reports delivered automatically by email (or Slack) on a schedule you define — daily, weekly, or monthly. This is different from Reports, which generates a single, one-off report on demand. Use Email Reports when you want a standing digest; use Reports when you want a specific export right now.
Email Reports is only shown in the sidebar for accounts with export permission (Pro plans and above). The page states that you can create unlimited email reports.
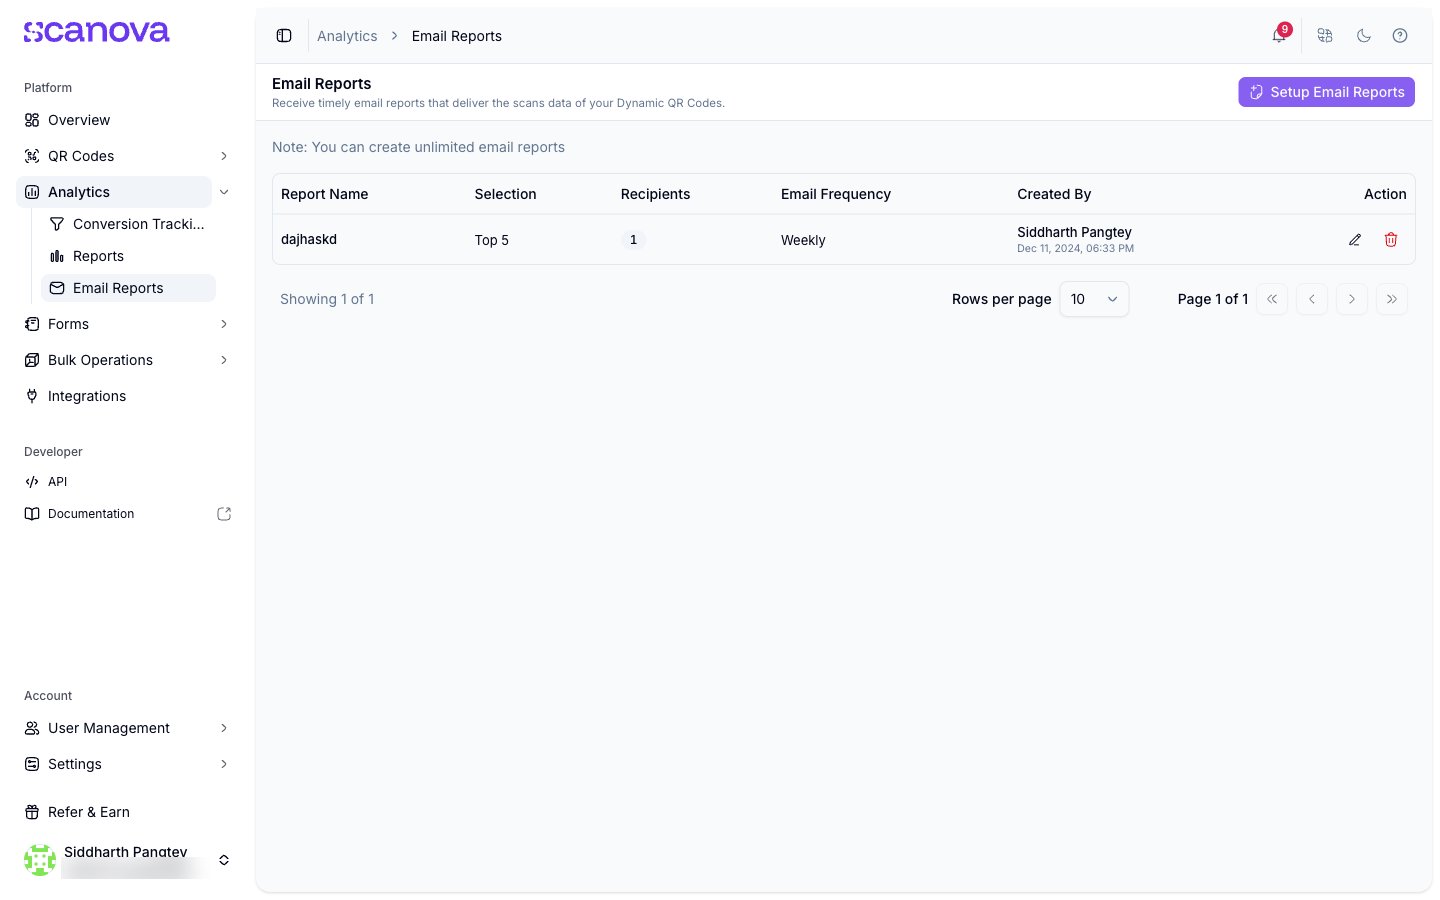
The Email Reports list, showing one scheduled report
From Analytics > Email Reports, select Setup Email Reports.
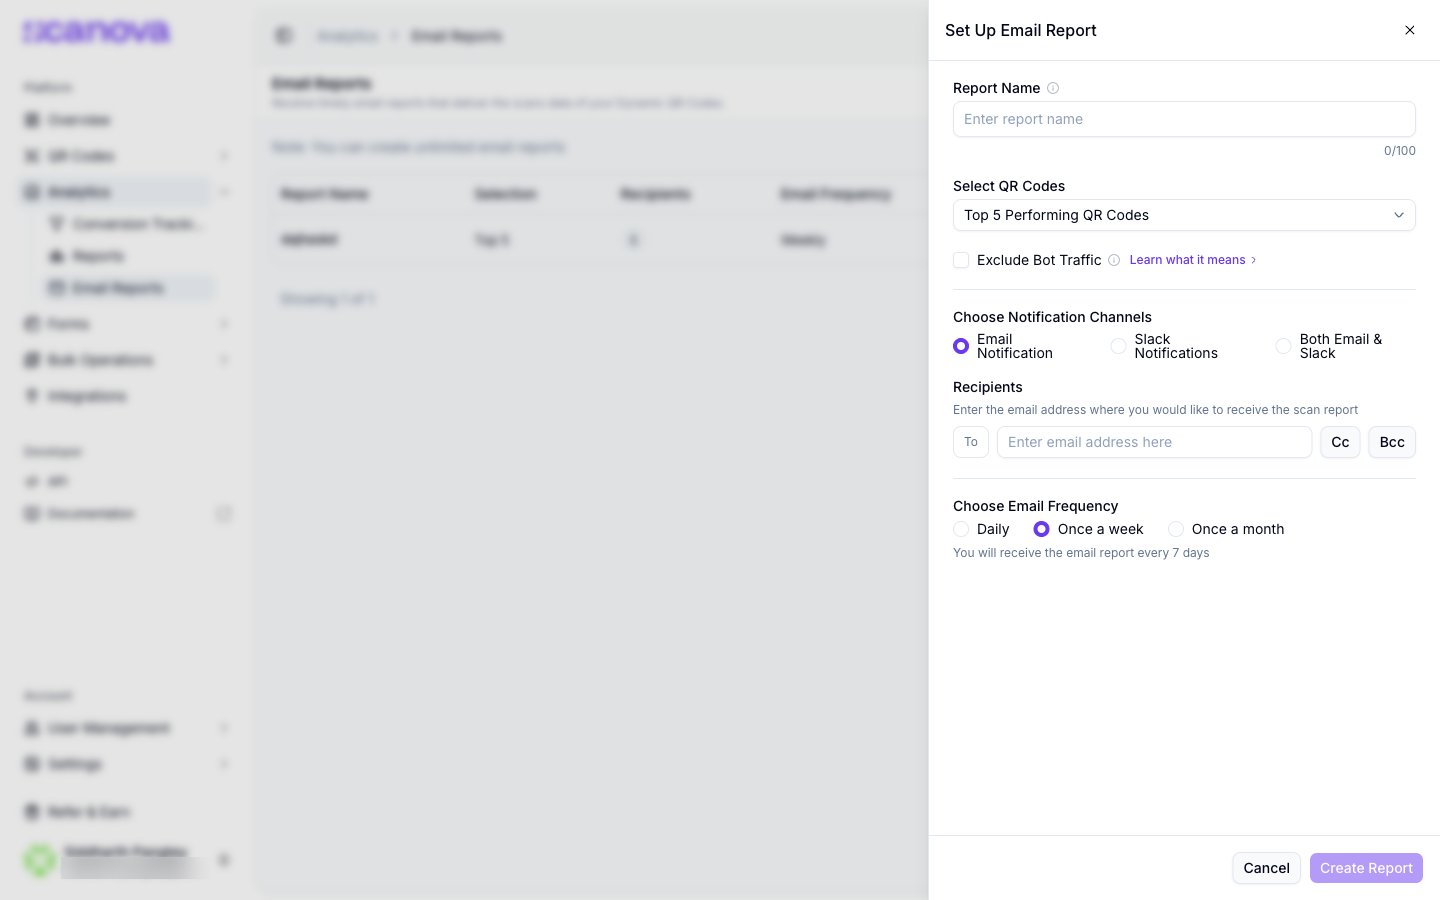
The Set Up Email Report drawer
2
Name the report
Enter a name in Report Name (up to 100 characters) so you can identify it later in the list.
3
Choose which QR Codes it covers
Under Select QR Codes, choose Top 5 Performing QR Codes, Top 10 Performing QR Codes, or Custom to pick specific codes yourself. Optionally check Exclude Bot Traffic to filter out non-human scans.
4
Pick a notification channel
Under Choose Notification Channels, select Email Notification, Slack Notifications, or Both Email & Slack. Selecting a Slack-based option checks your workspace’s Slack connection status before you can proceed — connect Slack under Integrations first if you plan to use it.
5
Add recipients
Under Recipients, enter at least one email address in the To field. Select Cc or Bcc to reveal additional recipient fields if you need to loop in more people without them being primary recipients.
6
Set the frequency
Under Choose Email Frequency, choose Daily, Once a week, or Once a month. A helper line below confirms the cadence in plain language (for example, “You will receive the email report every 7 days” for weekly).
7
Create the report
Select Create Report. A confirmation toast appears, and the new schedule is added to the list on the Email Reports page.
After creating a report, reload the page if the list doesn’t immediately show your new entry — a report can be created successfully in the background while the list still shows its empty state until a full refresh.
The Email Reports table lists each schedule’s name, QR Code selection, recipient count, frequency, and creator. Use the Action column to edit a schedule (pencil icon) or delete it (trash icon) — deleting prompts a confirmation dialog before removing it.