A complete walkthrough of your first Quick Code: Log In, pick the Website URL type, fill in the destination URL, and publish a scannable Dynamic QR Code.
This walkthrough creates the simplest possible QR Code — a Quick Code that redirects to a website URL — from a fresh login to a published, scannable code.
1
Log In
Go to your Scanova login page and Log In with your email and password (or Google/SSO). You land on the Overview dashboard at /overview.
2
Open the Create QR Code hub
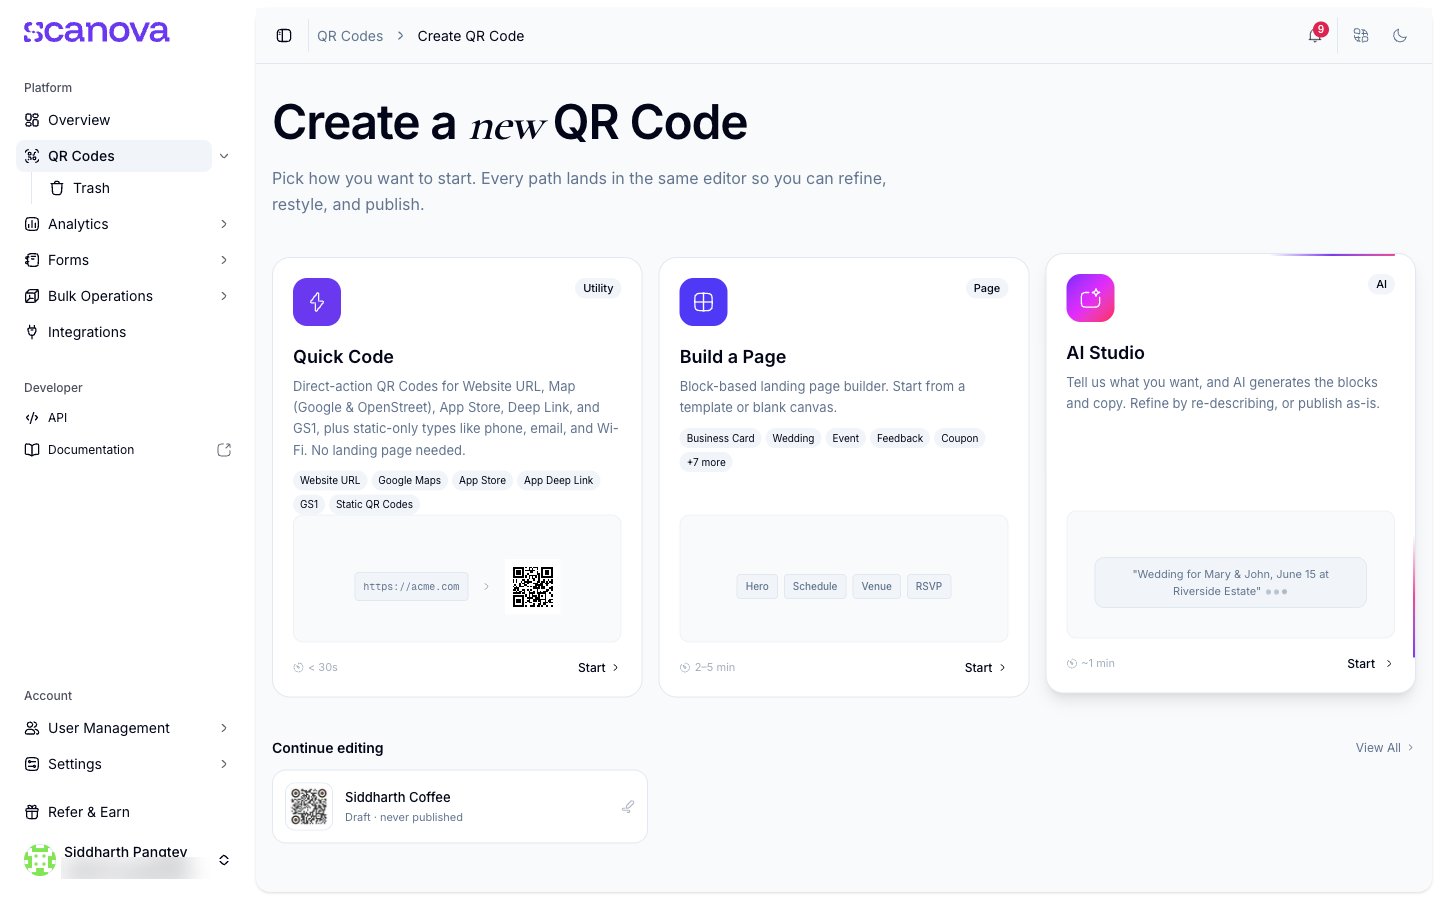
Click Create QR Code at the top-right of the page header. It appears on Overview and QR Codes only, so from any other section navigate to /qr/create instead. This hub presents three starting points as cards, left to right:
The Create QR Code hub with Quick Code, Build a Page, and AI Studio cards
Quick Code — a direct QR Code for a URL, phone number, email, Wi-Fi, or plain text, with no landing page
Build a Page — the block-based landing page builder, starting from a template or blank canvas
AI Studio — describe a page and let AI generate it (see AI QR / AI Studio; this card shows Upgrade rather than Start on plans that don’t include it)
For this walkthrough, click Start on the Quick Code card.
3
Pick a Quick Code type
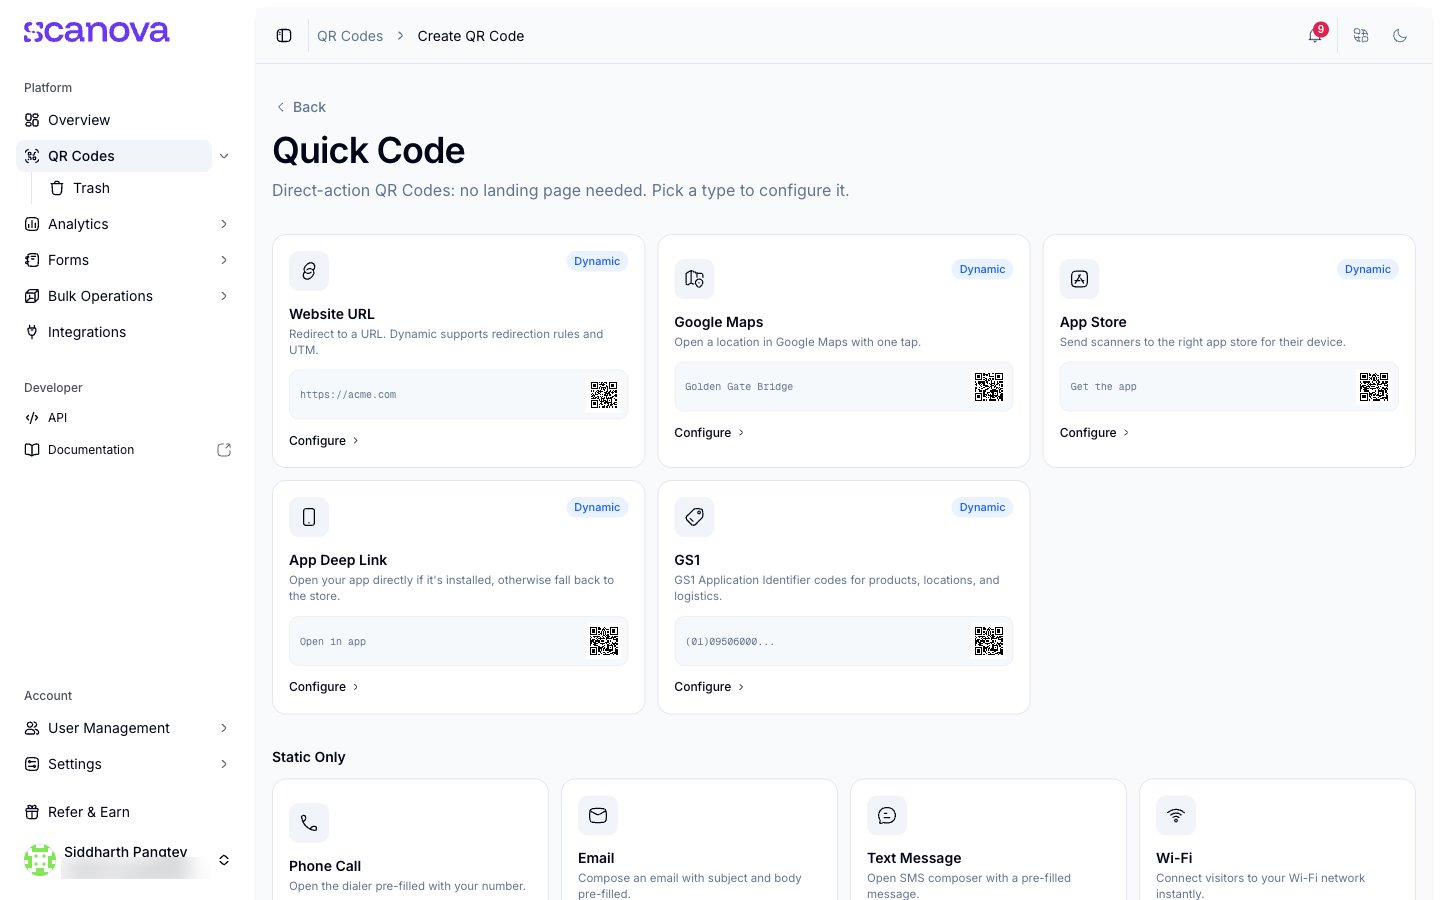
Quick Code opens a grid of direct-action types — Website URL, Google Maps, App Store, App Deep Link, and GS1 support Dynamic QR Codes, while Phone Call, Email, Text Message, Wi-Fi, Plain Text, Event Calendar, and Contact Card are Static-only.
The Quick Code type picker
Click Configure under Website URL. This opens the form at /qr/quick/url.
4
Fill in the URL
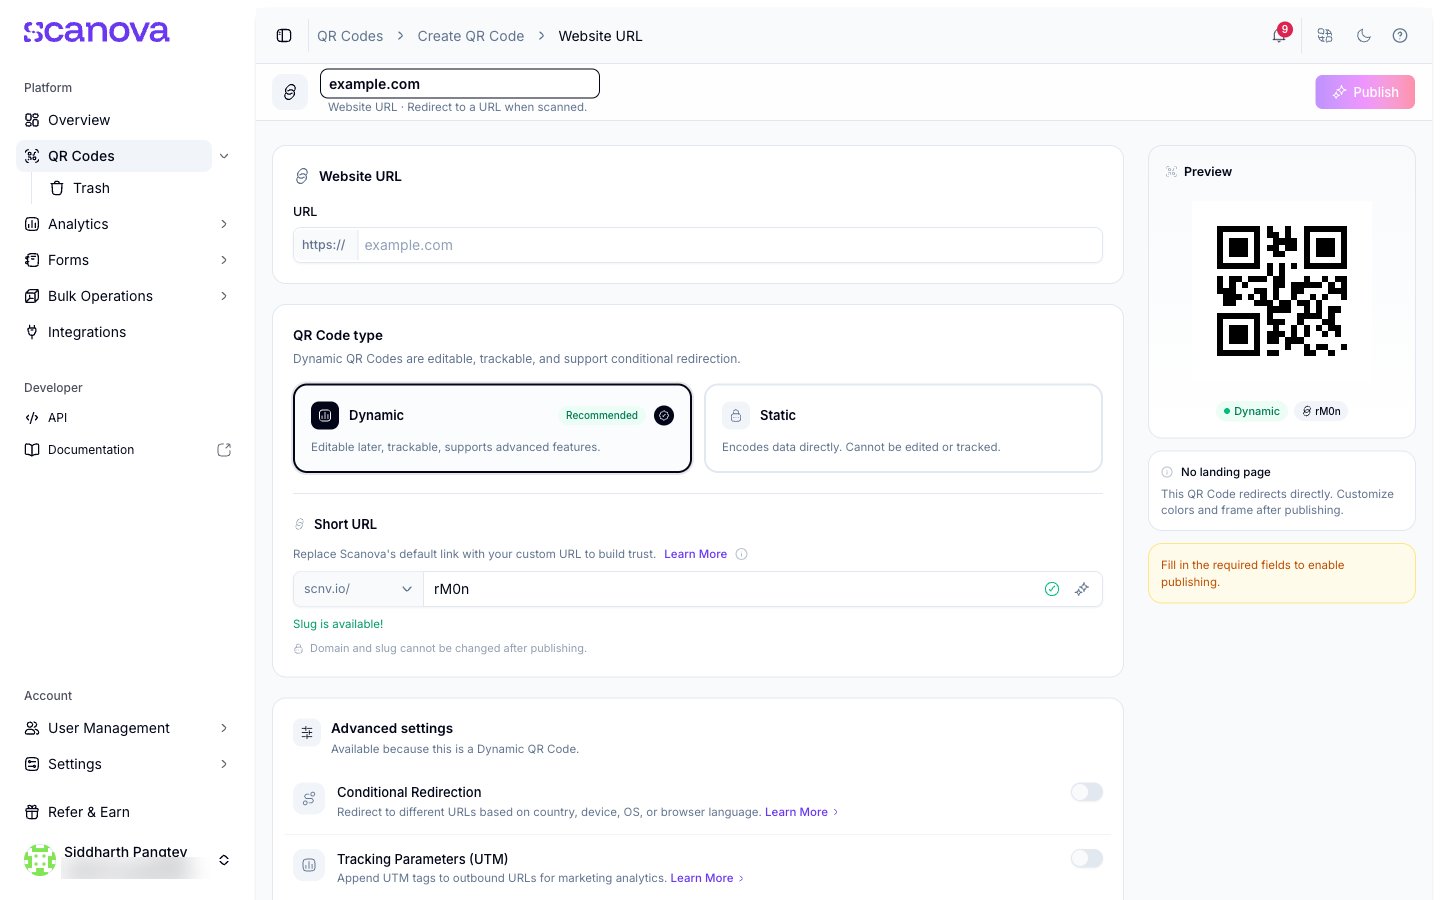
Enter the destination address in the URL field (the https:// prefix is fixed, so type just the rest, e.g. example.com).
The Website URL form with the URL field filled in
Leave Dynamic selected (it’s the default and recommended) so the code stays editable and trackable after publishing. A Short URL slug is generated automatically — you can keep it or change it before publishing, since it can’t be edited afterward.
5
Publish
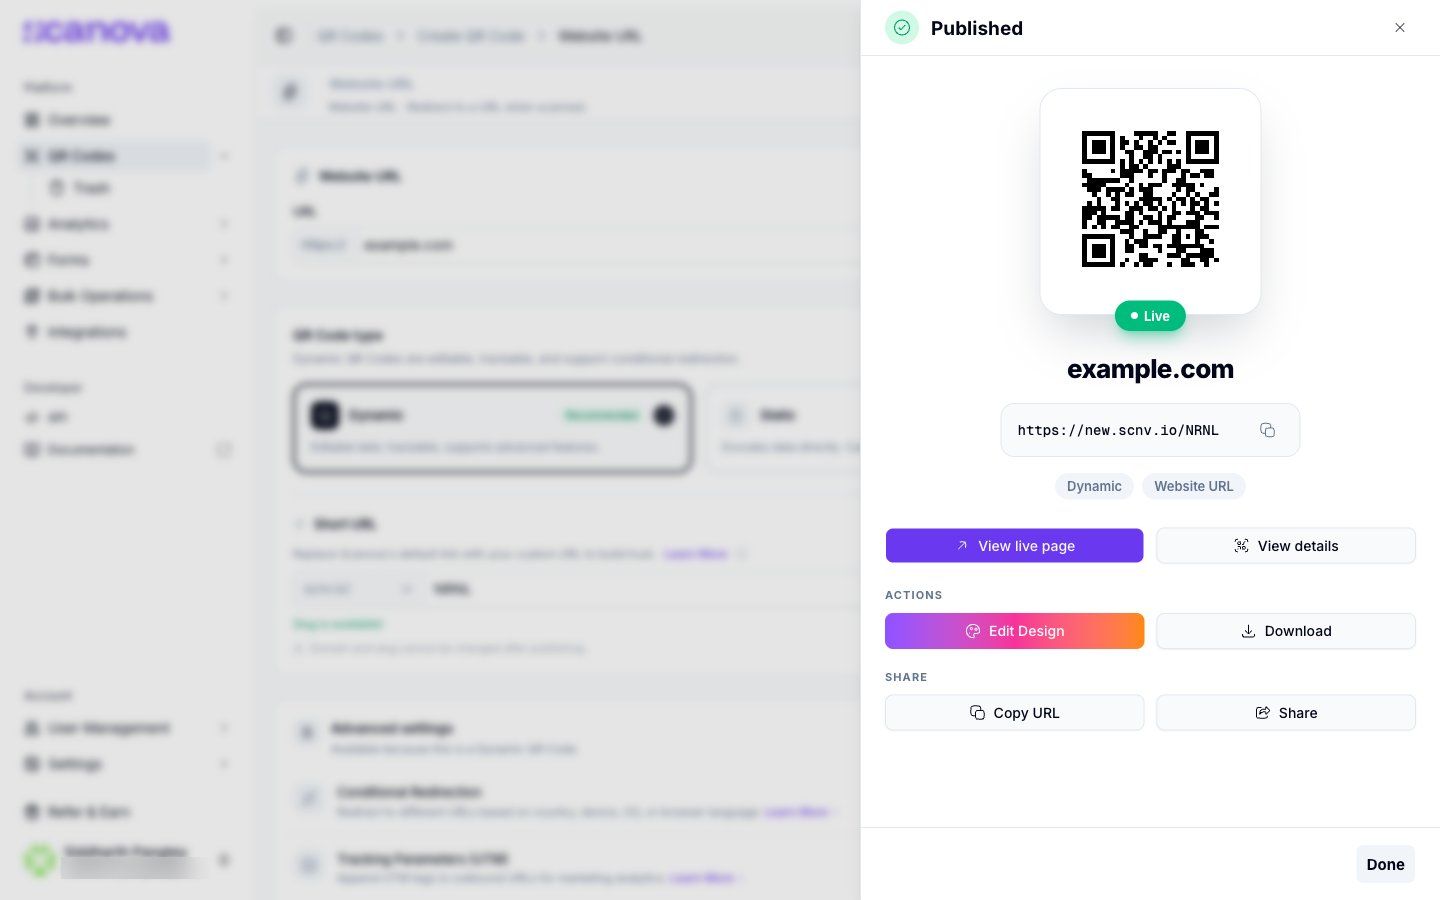
Click Publish in the top-right. A drawer opens with a live preview of the QR Code and an editable name — rename it here if you want something more specific than the default. Click Publish again in the drawer to confirm.
A Published confirmation appears with the final QR Code, its short URL, and quick actions.
The published code redirects instantly to the URL you entered — there’s no landing page to design, since Quick Codes are direct-action. From the confirmation drawer you can download the QR Code image, copy or share its short URL, or open Edit Design to restyle the code’s colors and frame. The code itself now appears in QR Codes in the sidebar, where you can search, tag, or move it into a folder.
If you’d rather build a branded landing page instead of a direct redirect, see Quick Code vs. full Page for how to choose, and the Page Builder overview for the block-based editor.