

/onboarding before they ever see the main dashboard — its whole purpose is to get one QR Code created before you’re left to explore on your own.
Who sees this, and why
The wizard only applies to a genuinely new account owner — a teammate accepting a shared-user invitation trips the same underlyingfirst_login flag on their first login too, but is deliberately exempted, since the wizard assumes permissions (like creating a QR Code) that a Viewer or other restricted role may not hold. A newly-invited teammate goes straight to the dashboard instead.
If profile completion is still outstanding, that gate takes priority — the wizard only appears after your profile is complete.
Step 1 — Choose
The wizard opens on a personalized welcome (“Welcome, {name}! Let’s create your first QR Code.”) with three starting points, matching the same three options available everywhere else in the app (see Quick Code vs. full Page):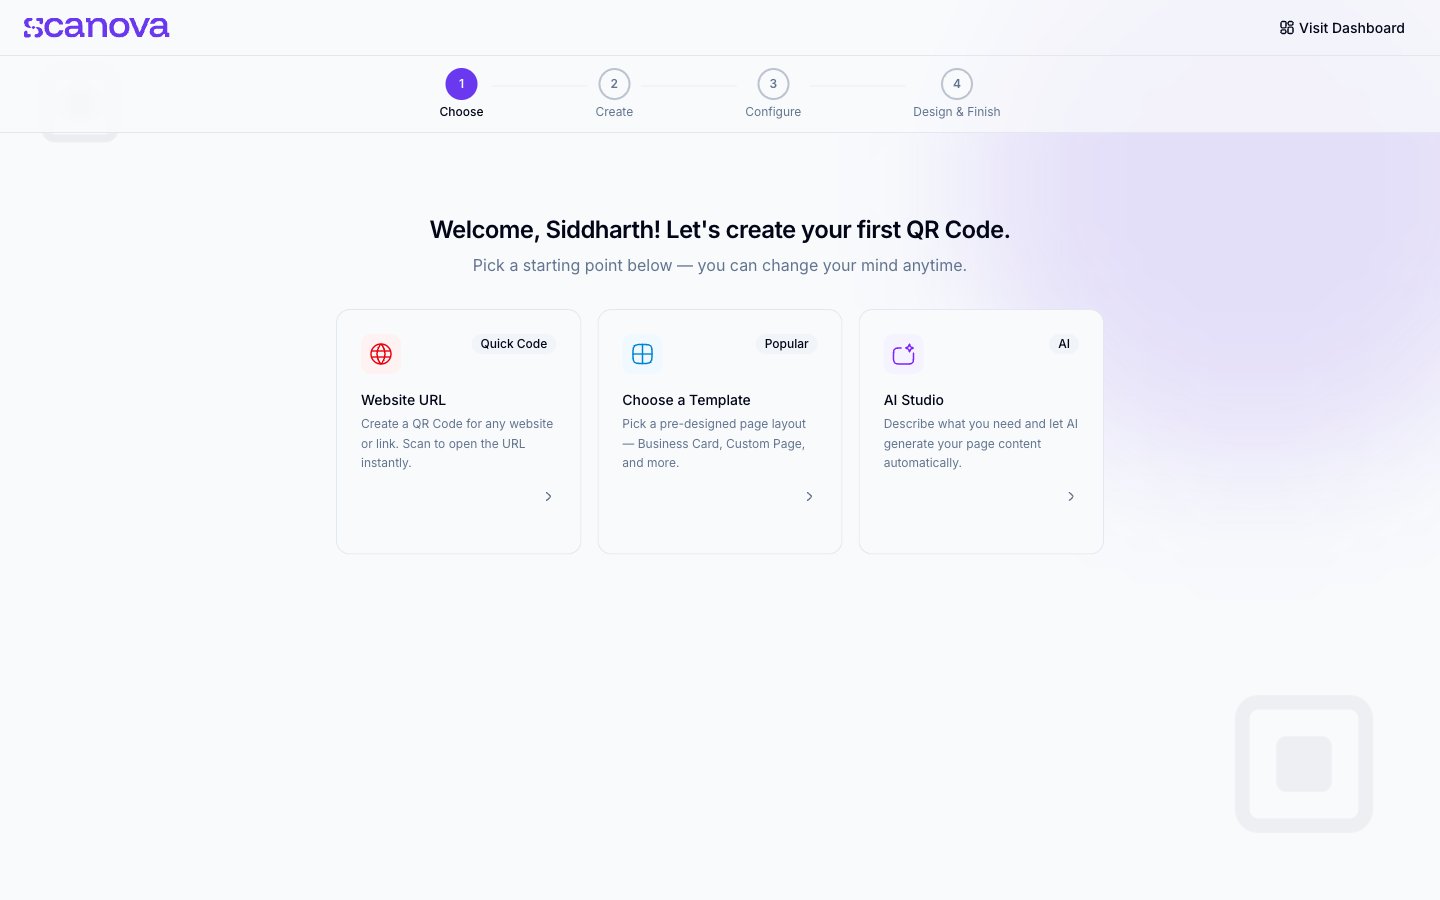
Step 1 of the onboarding wizard — choosing a starting point
- Website URL (under Quick Code) — a direct-action QR Code that opens a link when scanned
- Choose a Template (labeled Popular) — a pre-designed page layout, such as Business Card or Custom Page
- AI Studio (labeled AI) — describe what you need and let AI generate your page content automatically
Step 2 — Create
Selecting a starting point opens its type-specific creation form. For Website URL, this asks for the destination URL, the Short URL that will front it, and whether to switch on GPS location tracking, with a live QR Code preview rendering on the right as you type: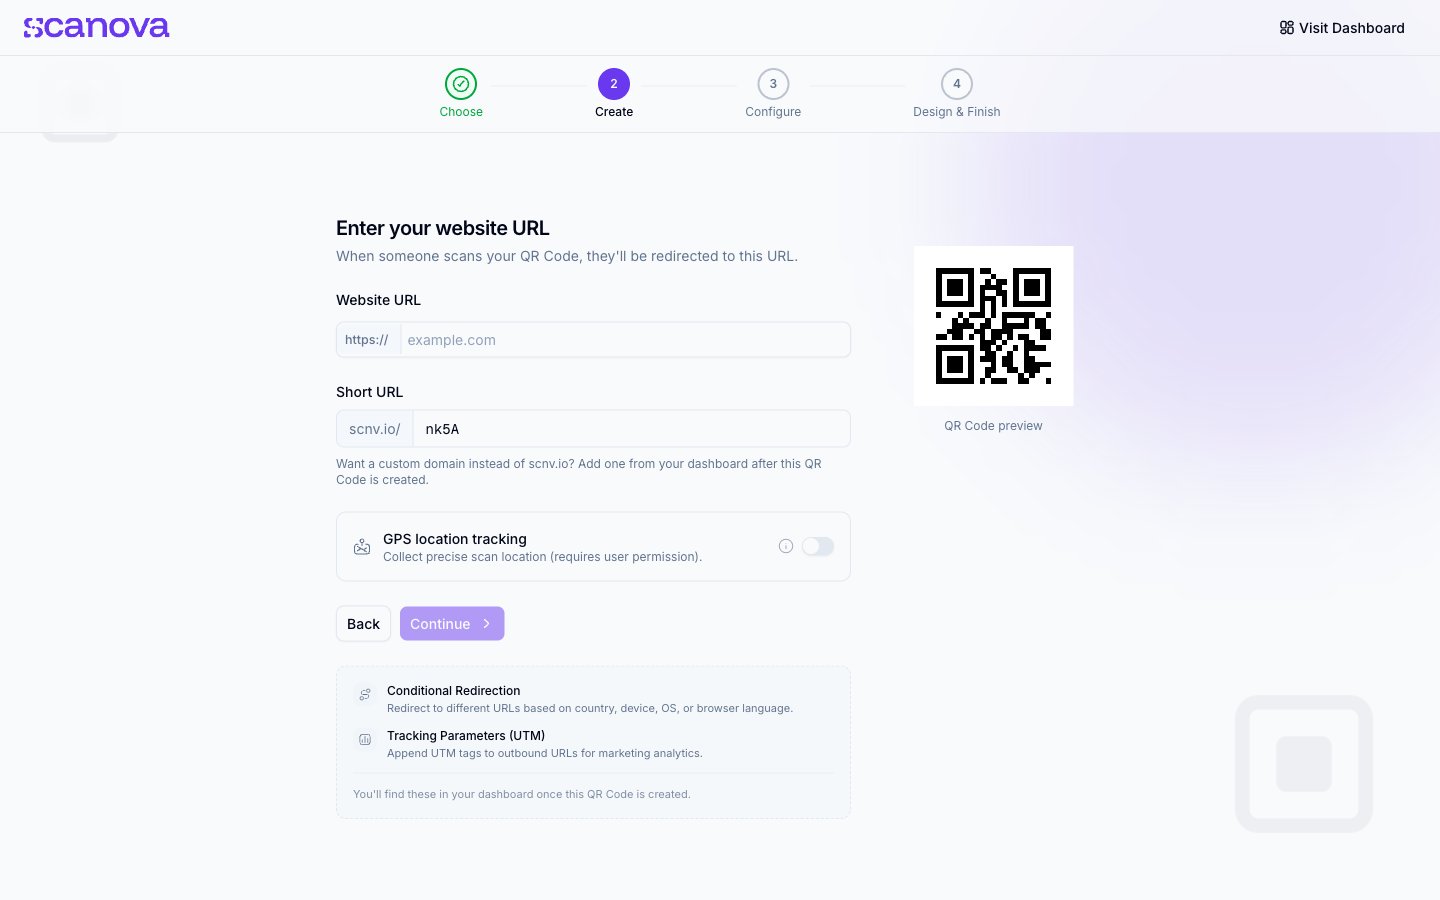
Step 2 — entering a website URL, with a live QR Code preview
Step 3 — Configure
Next, name the QR Code and optionally pick a design for it: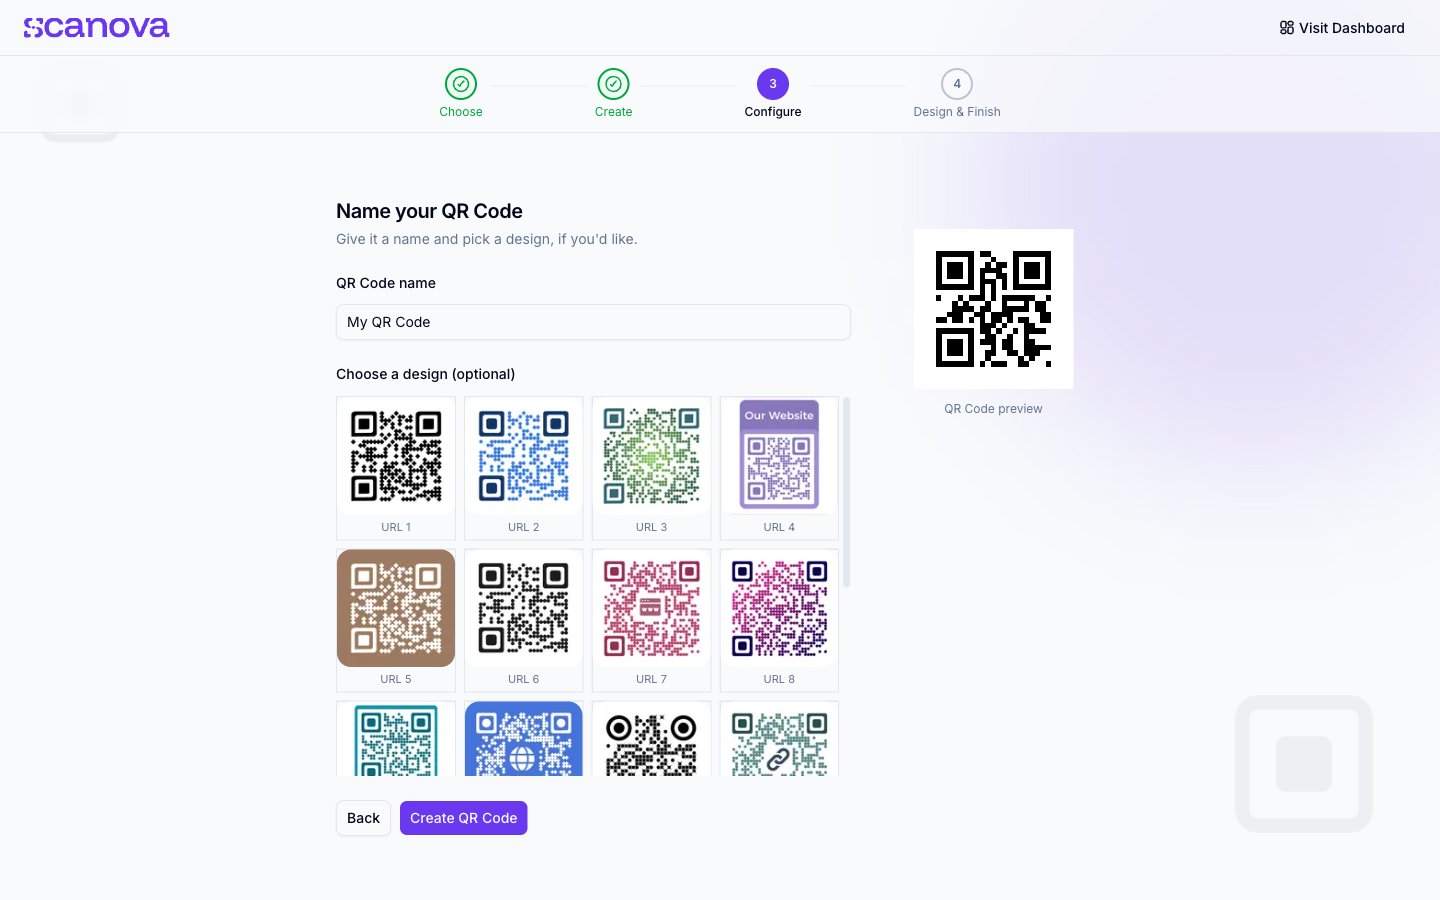
Step 3 — naming the QR Code and configuring its short URL
- QR Code name — pre-filled with “My QR Code”, so it is safe to leave alone
- Choose a design (optional) — a gallery of ready-made QR Code styles, or skip it and style the code later from the dashboard
Step 4 — Design & Finish
The last step confirms success with a celebratory confetti animation and your finished, scannable QR Code: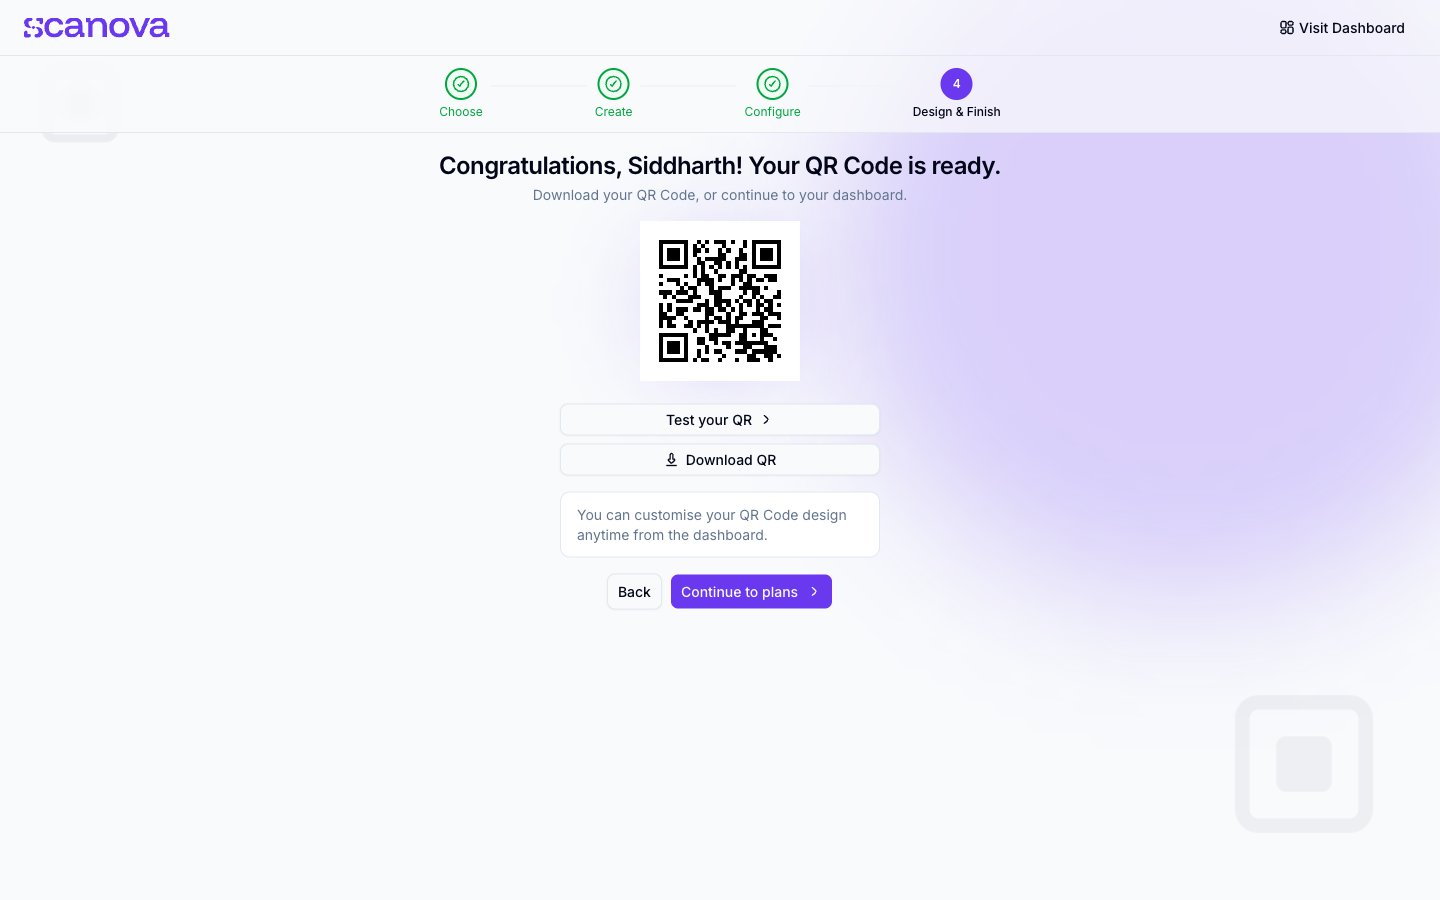
Step 4 — the finished QR Code, ready to test, download, or customize
- Test your QR — opens the destination in a new tab, the same way a scan would
- Download QR — downloads the QR Code image
- Continue to plans — the final action, which moves you into the main app
Related
- Quick Code vs. full Page — the same three starting points, available at any time from
/qr/create, not just during onboarding - Classic to New UI — a separate, one-time account-level decision, unrelated to this wizard