The UTM builder appends standard UTM tracking parameters to a Dynamic QR Code’s outbound URL, so a scan shows up correctly attributed in an external analytics tool (like Google Analytics) rather than as an anonymous visit. It’s the Tracking Parameters (UTM) toggle under Advanced settings on any Dynamic Quick Code form (for example, Website URL or Google Maps), next to Conditional Redirection.
UTM builder is only available on Dynamic QR Codes with an outbound destination URL — it doesn’t apply to Static QR Codes or to categories with no external redirect.
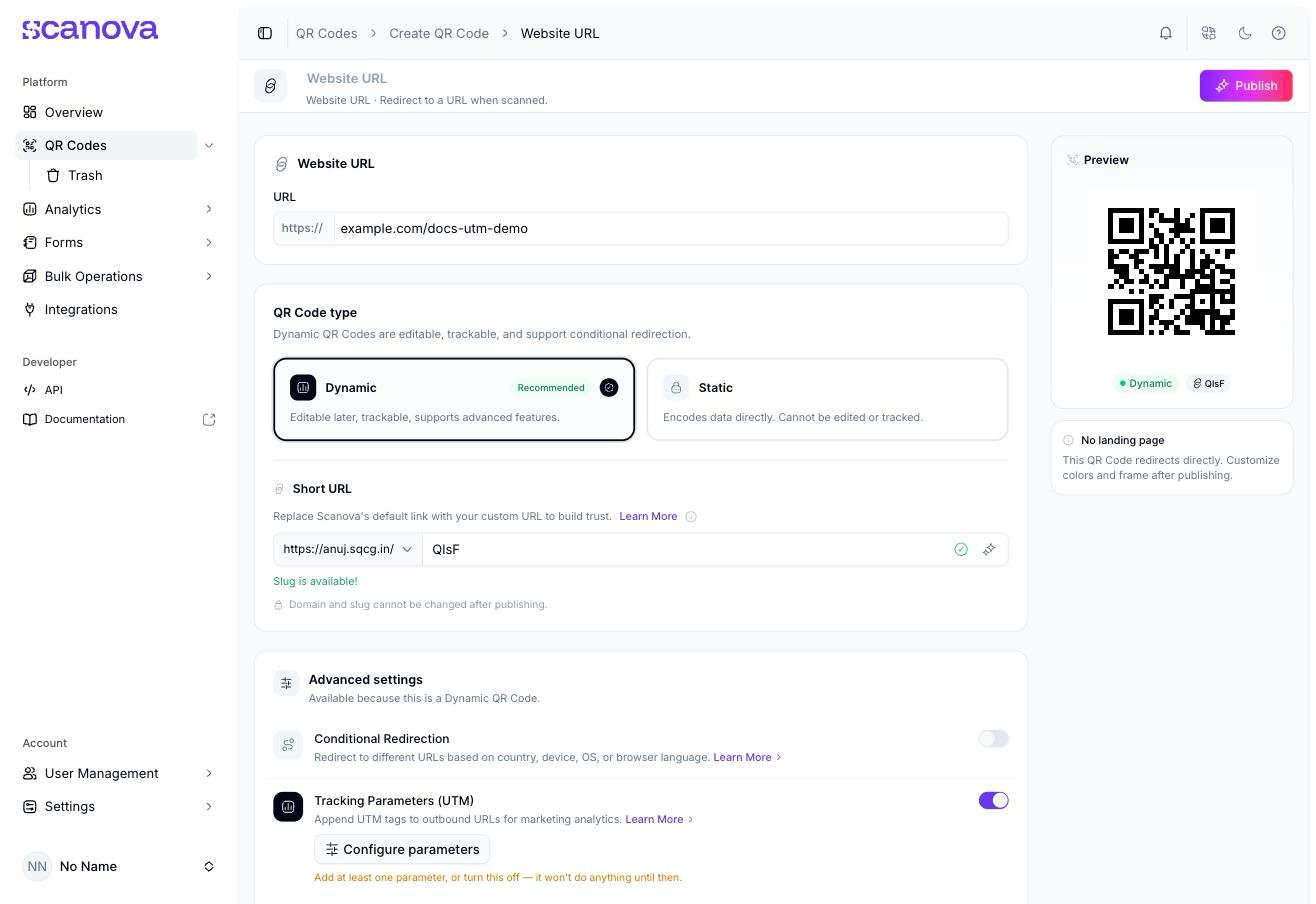
On the QR Code’s create (or edit) form, under Advanced settings, switch on Tracking Parameters (UTM) — “Append UTM tags to outbound URLs for marketing analytics.” A Configure parameters button appears, along with a warning that nothing happens until at least one parameter is added: “Add at least one parameter, or turn this off — it won’t do anything until then.”
Tracking Parameters (UTM) toggled on, before any parameters are added
2
Open Add Tracking Parameters
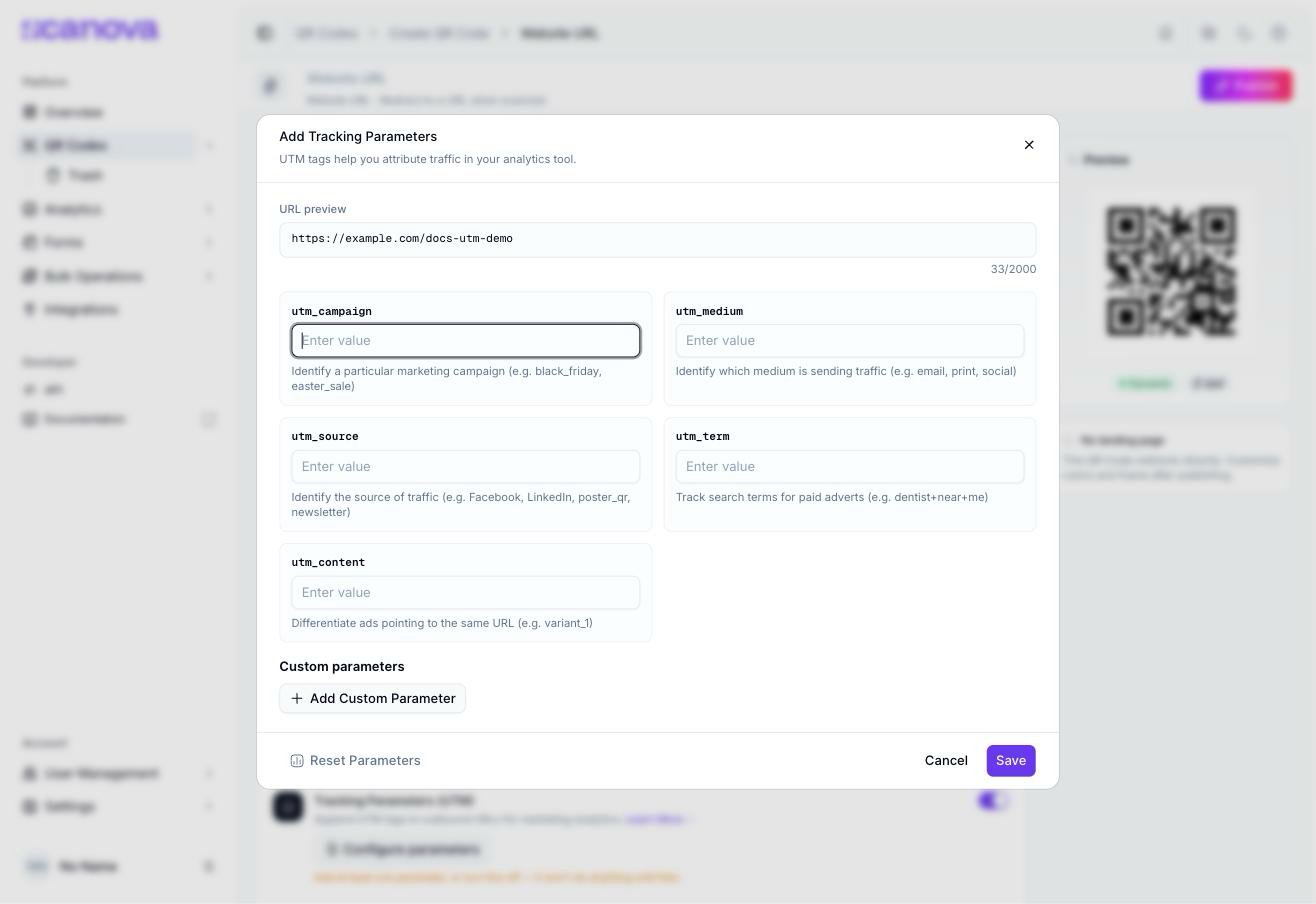
Click Configure parameters. The dialog shows a live URL preview of the destination URL with a running character count (max 2000), five standard UTM fields — utm_campaign, utm_medium, utm_source, utm_term, utm_content — each with its own hint and example (e.g. utm_source — “Identify the source of traffic (e.g. Facebook, LinkedIn, poster_qr, newsletter)”), and a Custom parameters section for anything outside the standard five.
The Add Tracking Parameters dialog, empty
3
Fill in the parameters you need
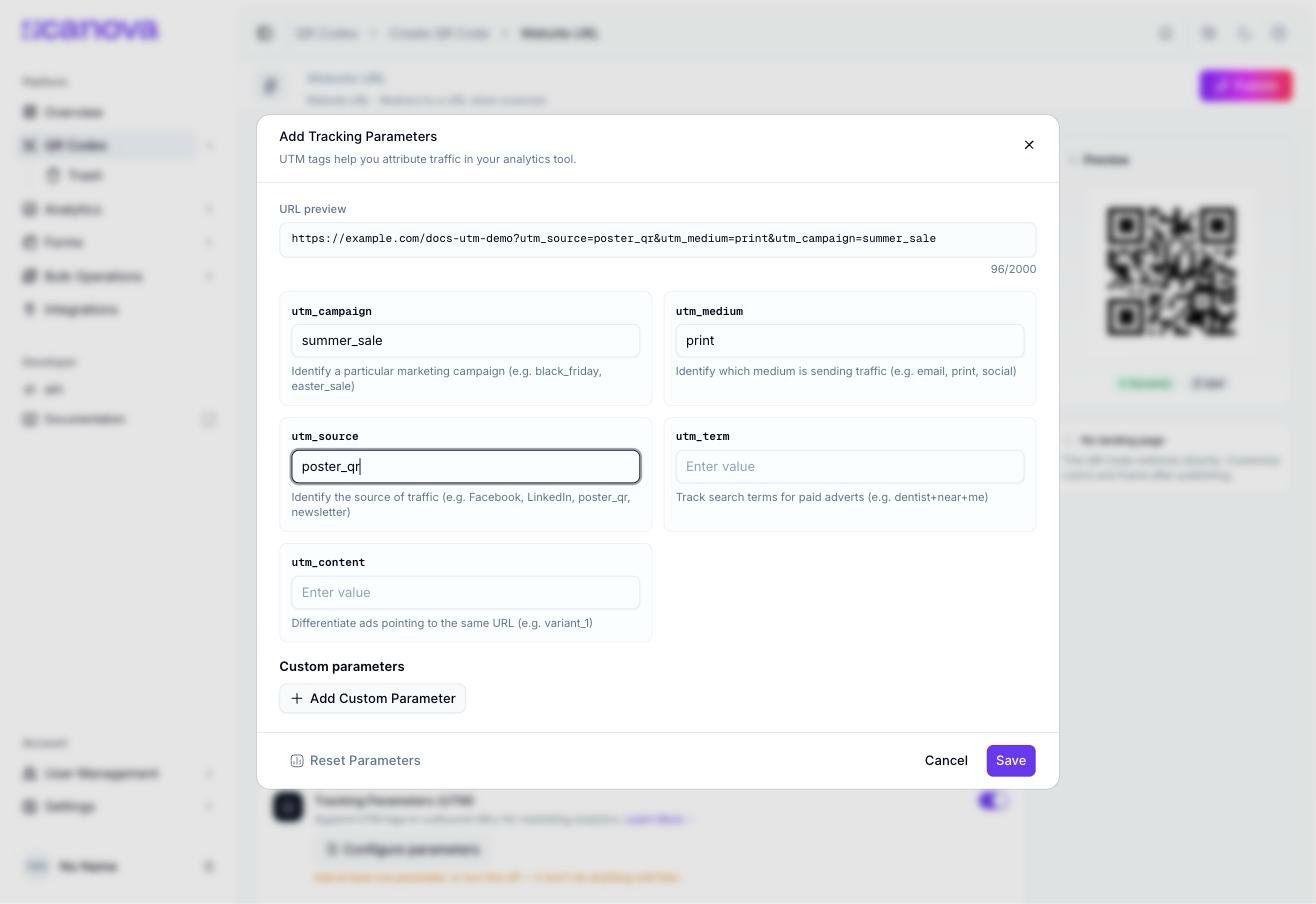
Type into any of the standard fields — the URL preview at the top updates live as query parameters, e.g. ?utm_source=poster_qr&utm_medium=print&utm_campaign=summer_sale. You don’t need to fill in all five.
Tracking parameters filled in, with the URL preview showing the resulting query string
4
Add a custom parameter (optional)
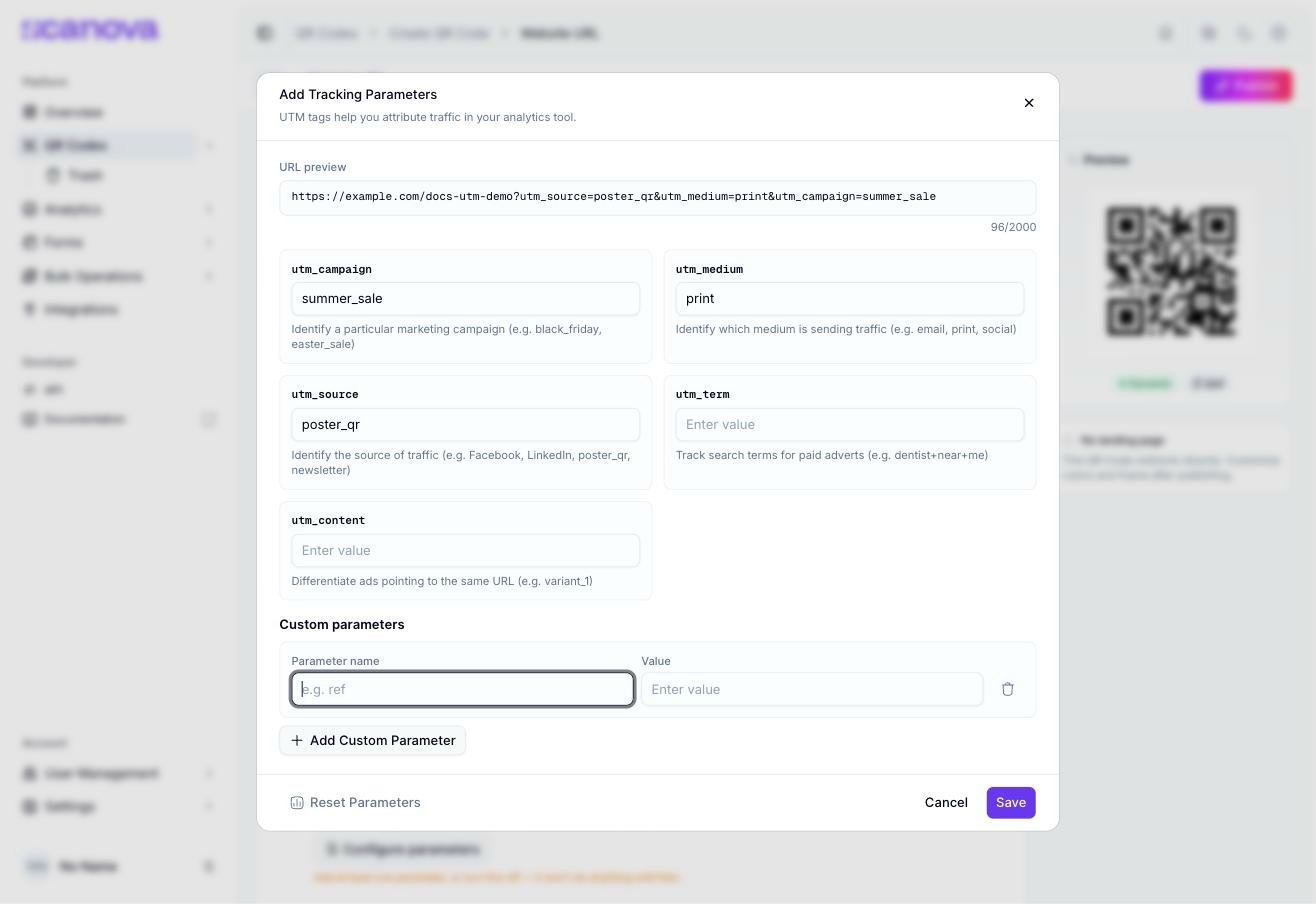
Click Add Custom Parameter to add a Parameter name / Value pair for anything not covered by the standard five (placeholder example: ref). Each custom row has its own delete (trash) icon.
A custom parameter row added below the standard UTM fields
5
Save
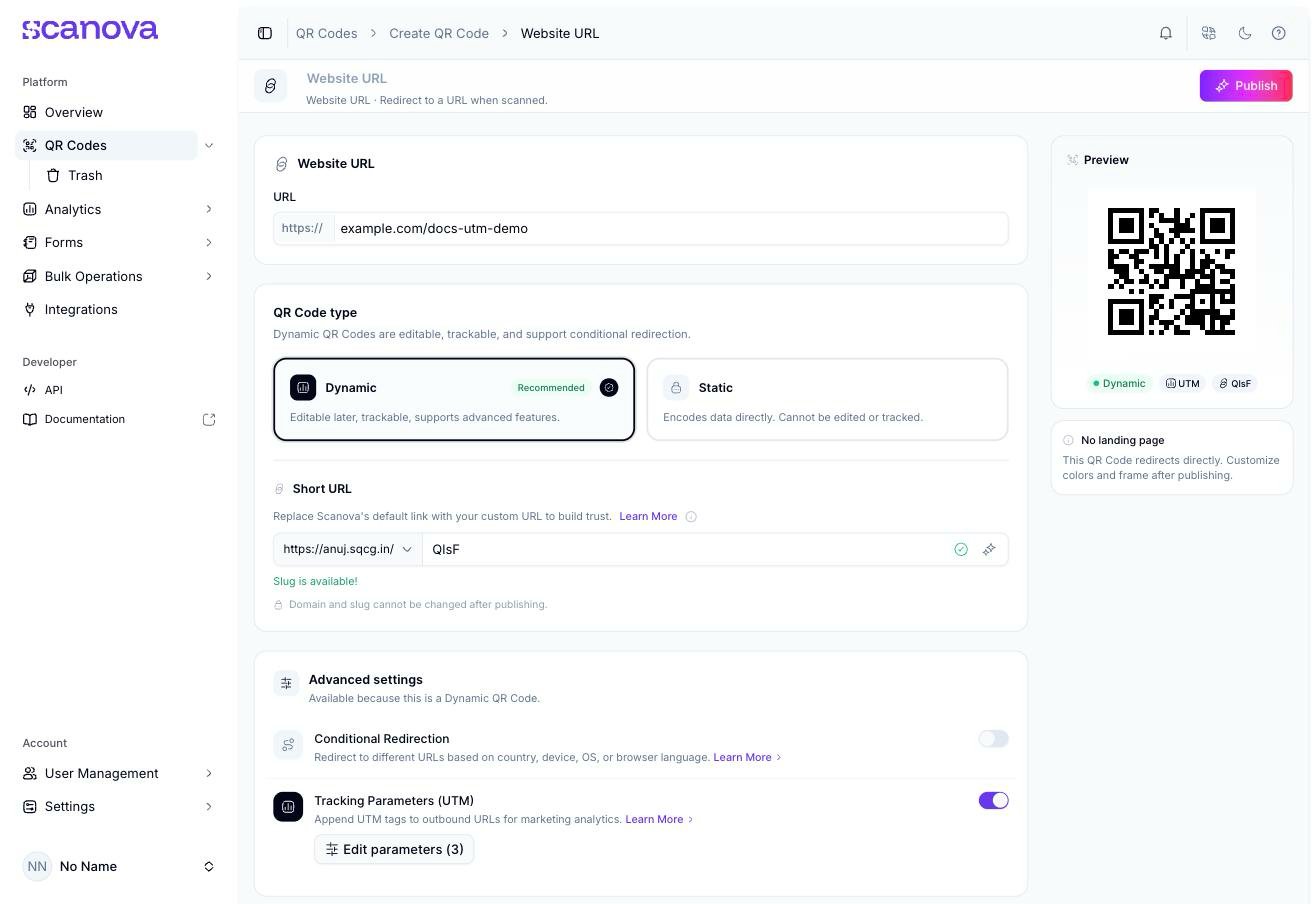
Click Save. The Configure parameters button is replaced with Edit parameters (N), where N is the number of parameters set, and the QR Code’s preview panel gains a UTM badge alongside its Dynamic/category badges.
UTM configured with 3 parameters — the button label updates and a UTM badge appears on the preview
Use Reset Parameters in the dialog to clear every field at once, or Cancel to discard unsaved changes.