Multi-factor authentication (MFA) adds a second verification step to sign-in, on top of your password. Scanova supports three methods — email one-time codes, an authenticator app (TOTP), and passkeys — and all three live inside a single Manage MFA drawer. You can enable more than one method, pick a default, and generate backup codes in case you lose access to your usual method.
MFA is only available for accounts that sign in with a password. If your organization signs in through SSO, your identity provider handles authentication instead, and the MFA option doesn’t appear in your account settings.

Opening Manage MFA

Go to Account (your avatar menu, or /account) and find the Login & Security section on the Account tab. The Multi-Factor Authentication field shows your current status (Off, or On · {method}) with an edit icon that opens the drawer.
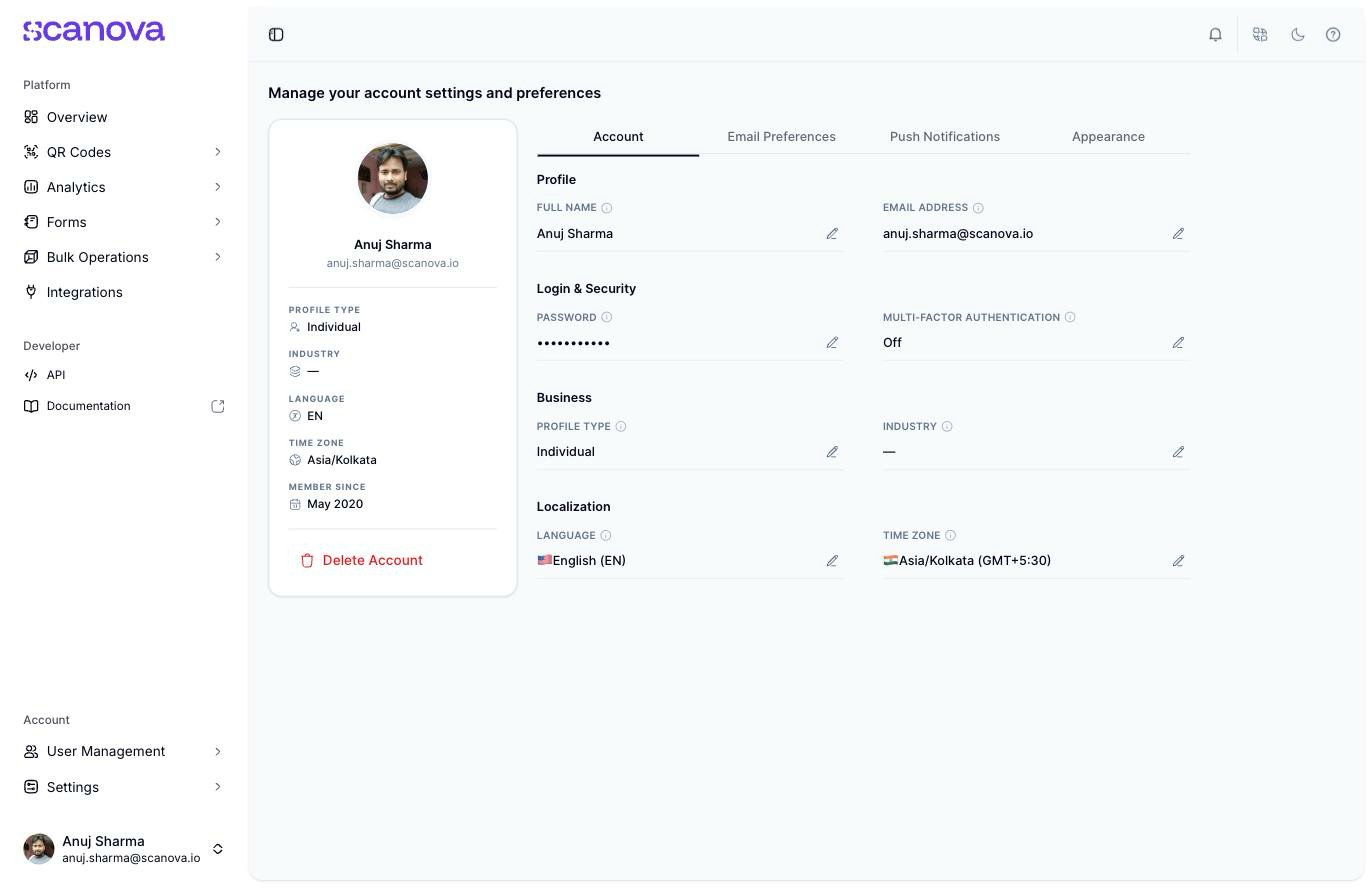
Scanova account page showing the Login and Security section with Password and Multi-Factor Authentication fields, the latter showing Off with an edit pencil icon

The Login & Security section of Account settings, with Password and Multi-Factor Authentication fields

Choosing a method

The first time you open the drawer, you’re asked how you’d like to get your verification code:
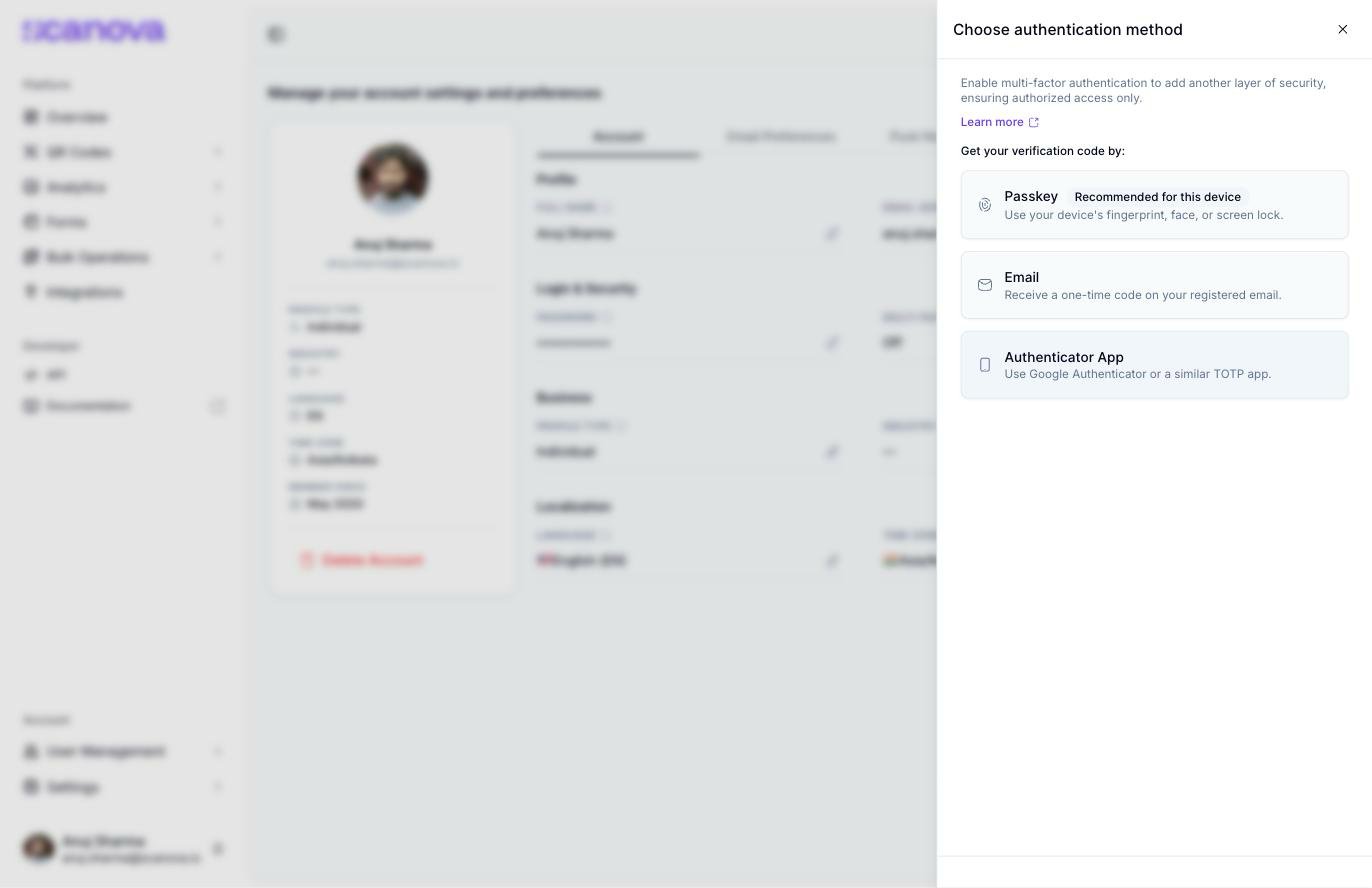
Choose authentication method drawer with three options: Email (receive a one-time code on your registered email), Authenticator App (use Google Authenticator or a similar TOTP app), and Passkey (use your device's fingerprint, face, or screen lock)

The Choose authentication method step, listing Email, Authenticator App, and Passkey

  • Email — a one-time code is sent to your registered email address at sign-in.
  • Authenticator App — codes are generated by an app like Google Authenticator (any TOTP-compatible app works).
  • Passkey — your device’s fingerprint, face unlock, or screen lock. See Passkeys for a dedicated walkthrough of this method.
If your browser reports that your device supports a built-in (platform) authenticator, Passkey is listed first and flagged Recommended for this device.
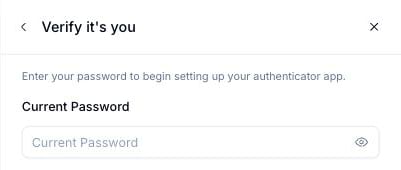
Whichever method you pick, you’re first asked to re-enter your password to confirm it’s you:
Verify it's you step asking for your current password before setting up an authenticator app

The password re-verification step before setting up a new MFA method

If your account has no password (for example, you only ever signed in with Google), this step shows a Continue with Google button instead, so you can confirm your identity that way.

Setting up an authenticator app

1

Verify your password

Enter your current password and select Next.
2

Add the account to your authenticator app
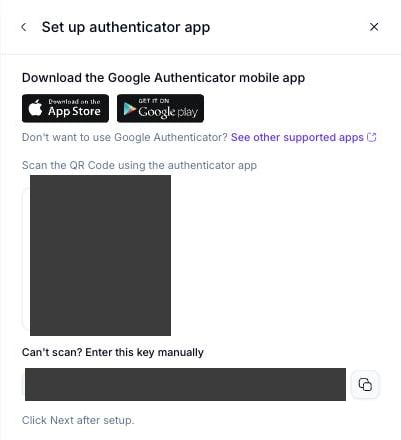
Scan the QR code with an app like Google Authenticator, or select the manual-entry key if you can’t scan.
Set up authenticator app step showing a QR code to scan, app store badges for Google Authenticator, and a manual entry key with a copy button

The authenticator app setup step, with a scannable QR code and a manual-entry key

Select Next once the account appears in your app.
3

Enter the current code

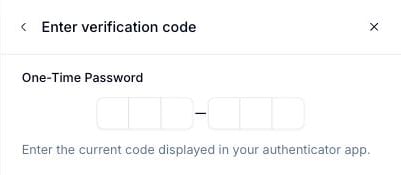
Your authenticator app now shows a 6-digit code that refreshes periodically. Enter it and select Verify.
Enter verification code step with a six-digit one-time password input and a Verify button

The verification code step after authenticator app setup

On success you’re shown your backup codes — the app is now an active MFA method on your account.

Email one-time codes

Choosing Email skips the app-setup step: after the password check, Scanova sends a 6-digit code to your registered email address and shows the same OTP-entry screen, with a countdown before you can request another code.
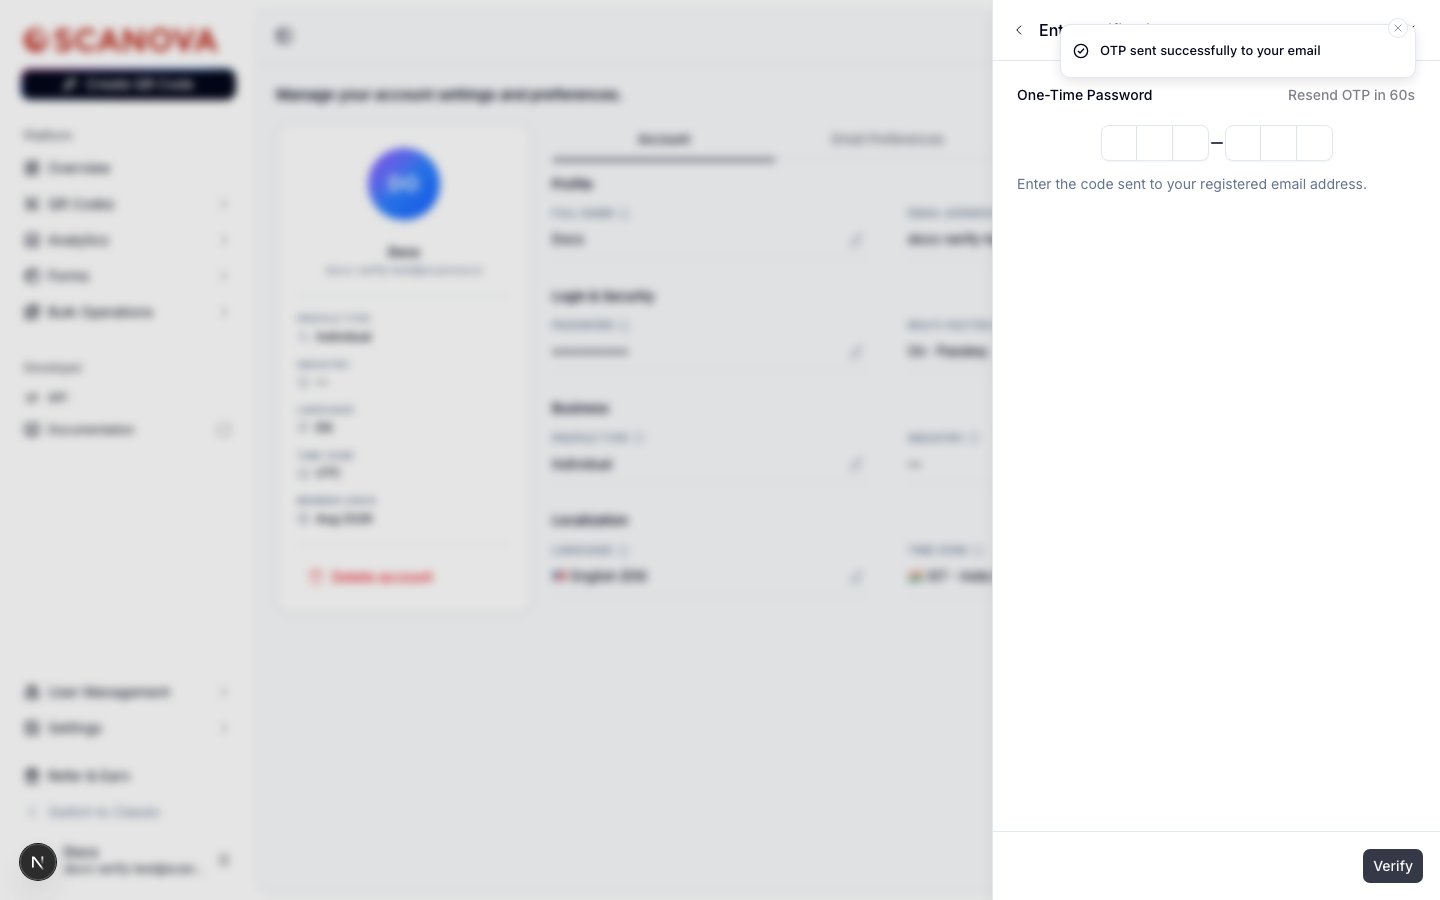
Enter verification code step for email MFA, showing an OTP sent successfully toast, a six-digit code input, and a Resend OTP in 60s countdown

The email one-time code entry step, showing a resend countdown

Passkeys

Passkeys use your device’s built-in biometrics or screen lock instead of a code. Setup and sign-in both work a little differently from the code-based methods above — see Passkeys for the full walkthrough.

Adding another method

Once you have at least one method enrolled, the drawer’s main view lists it with a Default badge and a delete (trash) icon, and the footer button changes to Add another method:
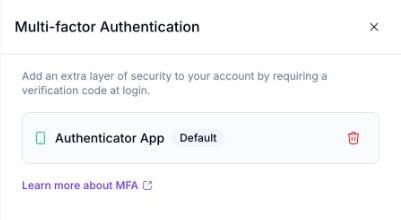
Multi-factor Authentication drawer showing Passkey enrolled with a Default badge, a trash icon to remove it, and an Add another method button

The MFA status view with one enrolled method
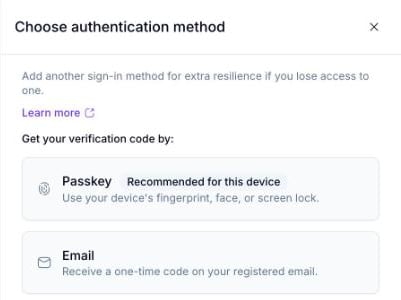
Selecting Add another method re-opens the method picker — now only showing methods you haven’t already enrolled, with copy adjusted to reflect that you already have MFA set up:
Choose authentication method step showing Email and Authenticator App options, with the intro text 'Add another sign-in method for extra resilience if you lose access to one'

Adding a second method once one is already enrolled

If you enroll more than one method, each row gets a Make default button (unless it’s already the default). Your default method is the one Scanova prompts for first at sign-in — you can still fall back to any other enrolled method or a backup code. To remove a method, select its trash icon, confirm your password (or re-authenticate with Google), and it’s removed immediately.

Saving backup codes

After enrolling your first MFA method, Scanova generates a set of single-use recovery codes. Save them somewhere safe — each can be used once to sign in if you lose access to your regular MFA method, and they’re never shown again after this step.
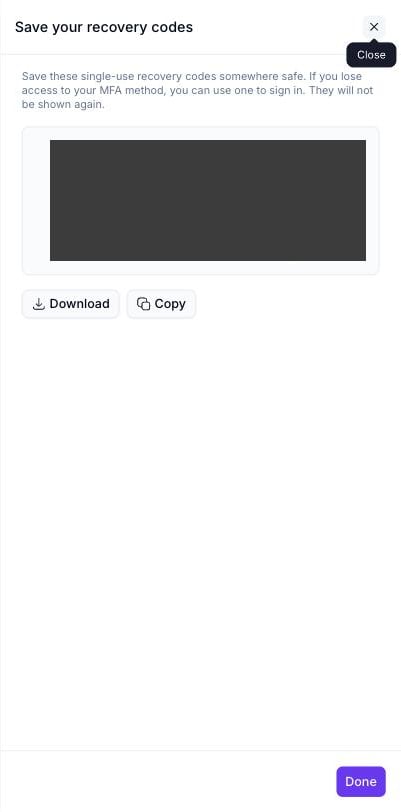
Save your recovery codes step showing a grid of ten single-use backup codes, with Download and Copy buttons and a Done button

The recovery codes step, with Download and Copy actions

Signing in with MFA

Once MFA is enabled, signing in with your password takes you to a security-check screen for your default method instead of straight into your account. For example, with a passkey as the default:
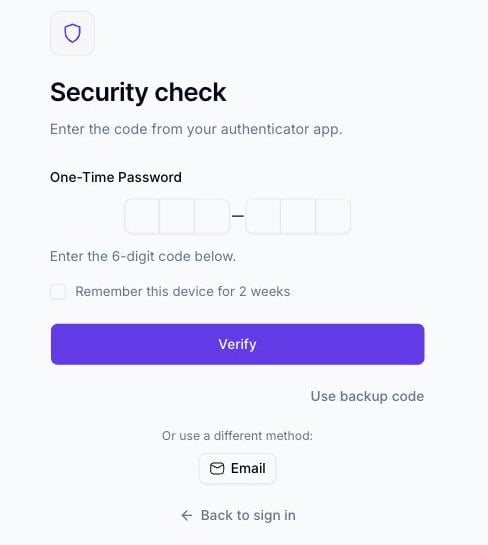
Security check screen reading 'Use your passkey to finish signing in', with a Remember this device for 2 weeks checkbox, a Sign in with your passkey button, and a Use backup code link

The MFA security check at sign-in

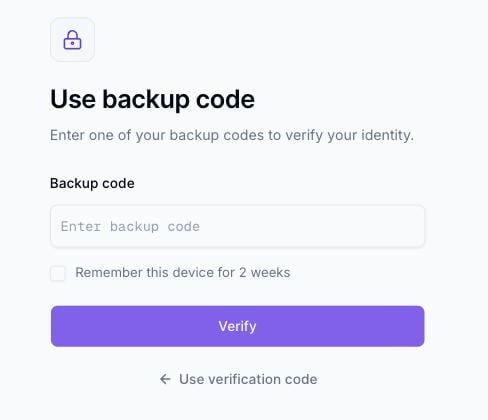
Check Remember this device for 2 weeks to skip the MFA challenge on that browser for the next two weeks. If you can’t use your default method, select Use backup code to enter one of the recovery codes you saved earlier:
Use backup code screen with a backup code input field, a Remember this device for 2 weeks checkbox, and a Verify button

Signing in with a backup code instead of the default MFA method

  • Passkeys — a closer look at the passkey method.
  • Google login — how Google sign-in is used both for login and for re-confirming your identity on password-less accounts.
  • Password reset — recovering access if you’ve forgotten your password (separate from MFA recovery codes).