Generate and customise Scanova QR Codes inside Photoshop, InDesign, and Premiere Pro, so print and video artwork can carry a live code as you design it.
The Adobe integration is a set of Scanova plugins for Adobe Creative Cloud apps, distributed through Adobe Exchange — not an OAuth connection. Nothing syncs back into Scanova; it lets you generate a QR Code without leaving your Adobe workflow.
This is a Design category integration. It has no “Active connection” state and doesn’t count against your integration connection quota — clicking through it in Scanova just opens the Adobe Exchange listing.
In the Scanova dashboard, go to Integrations in the left sidebar, click Add Integration, then filter to the Design category. Click Setup on the Adobe Creative Cloud card to open its setup panel.
2
Open the Adobe Exchange listing
Click Open in marketplace. This opens a Scanova search on Adobe Exchange in a new tab.
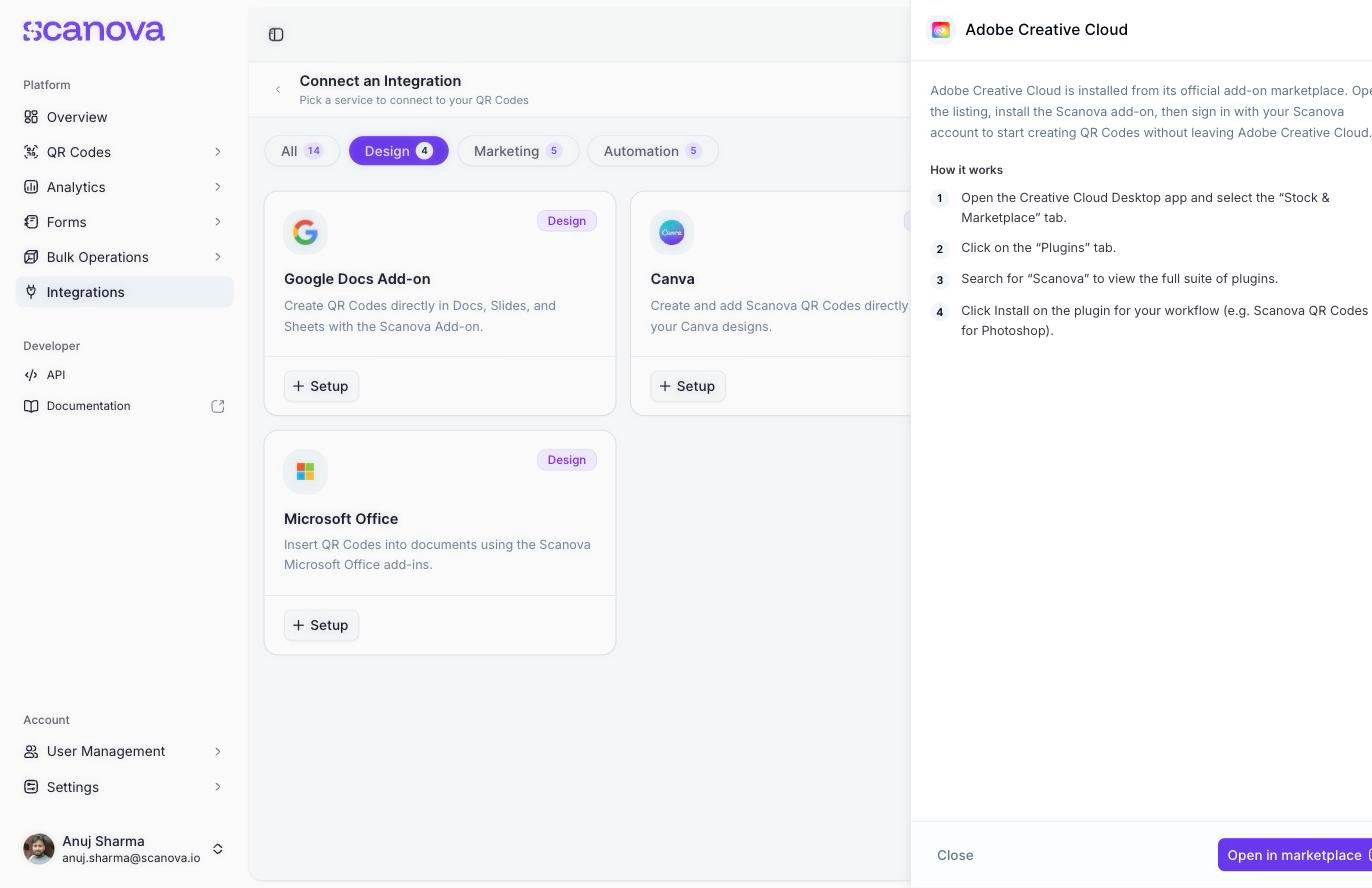
The Adobe Creative Cloud setup panel in Scanova, with the manual install steps and the link to Adobe Exchange
3
Install from Creative Cloud Desktop
Alternatively, install directly from the desktop app:
Open the Creative Cloud Desktop app and select the Stock & Marketplace tab.
Click the Plugins tab.
Search for Scanova to view the full suite of plugins.
Click Install on the plugin for your workflow (for example, Scanova QR Codes for Photoshop).
4
Generate a QR Code inside your Adobe app
Open the installed plugin’s panel from within Photoshop, InDesign, or Premiere Pro and sign in with your Scanova account to start generating QR Codes on the canvas or timeline.
Use this when your design work happens in Adobe’s apps — packaging layouts in InDesign, ad creative in Photoshop, video overlays in Premiere Pro — and you want a Scanova QR Code placed directly into that file rather than exported and re-imported as a static image.