How to create a form in Scanova: the six starting templates, all 16 question types, the block picker, and the General and Submit settings tabs in the builder.
Forms let you collect information from the people who scan your QR Code or visit your landing page. You build a form the same way you build a landing page — a block-based canvas with a live mobile preview — but a form’s canvas is limited to question blocks plus a header, a submit button, and an optional skip button.
From the left sidebar, click Forms. This opens your forms list, showing every form’s name, response count, linked QR Codes, and creation date.
The sidebar also shows a Lead Lists item under Forms, tagged Legacy. Lead Lists is the deprecated predecessor to Forms — it still works, but new forms should use the Forms builder described here.
From the forms list, click New Form in the top right.
2
Choose a starting template
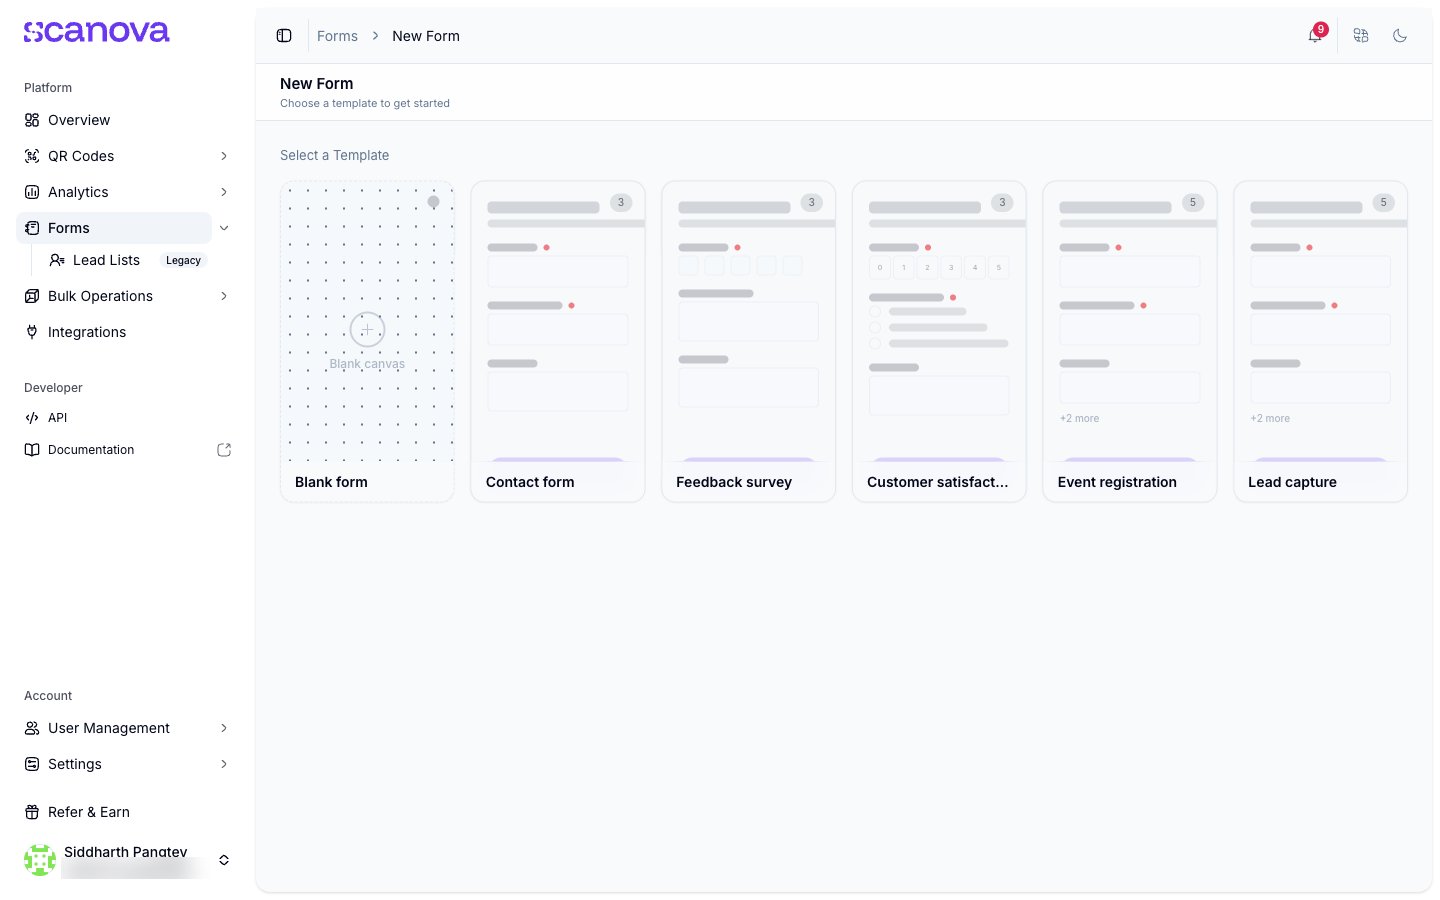
Pick one of six templates:
Blank form — start from an empty canvas
Contact form — Full Name, Email, and Message
Feedback survey
Customer satisfaction
Event registration
Lead capture
Choosing a starting template for a new form
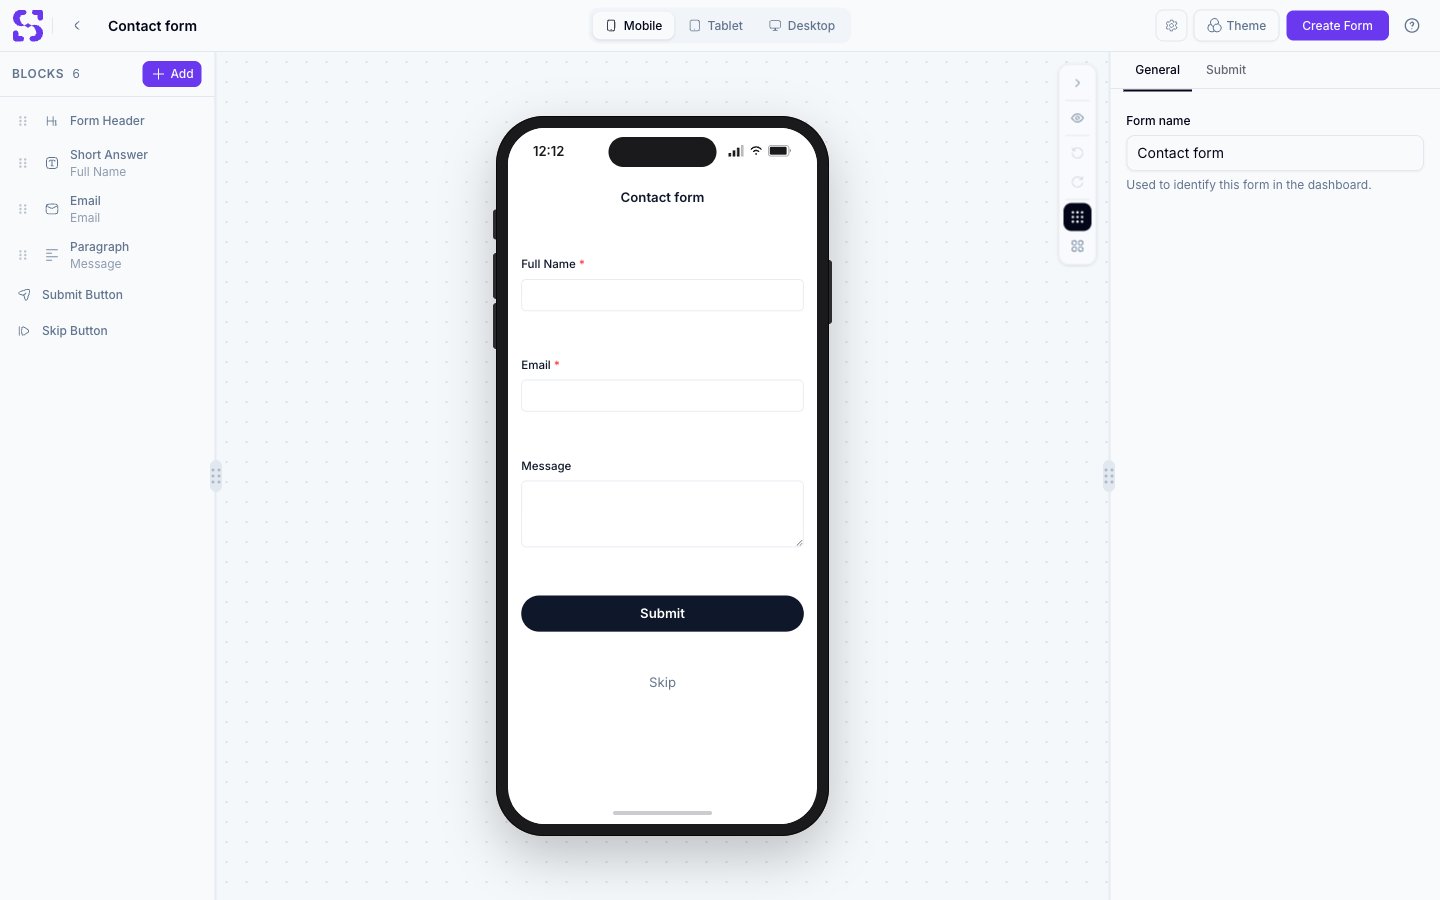
The Contact form template’s three questions are Full Name, Email, and Message only — there is no phone field. If you need to collect a phone number, add a Phone Number question block yourself.
3
Edit in the form builder
Selecting a template opens the form builder immediately, with the template’s blocks already on the canvas.
The Contact form template opened in the form builder — Full Name, Email, and Message, with no phone field
Every form — regardless of template — is built from the same six-slot shape: a Form Header, one or more question blocks, a Submit Button, and an optional Skip Button. See Skip button & form gates for how Skip actually works.
Click Add above the BLOCKS list to open the question picker
Drag the handle on the left of any block in the BLOCKS list to reorder it
Click a block to select it and edit its Content/Design fields in the right panel
Select a block and click its trash icon to delete it
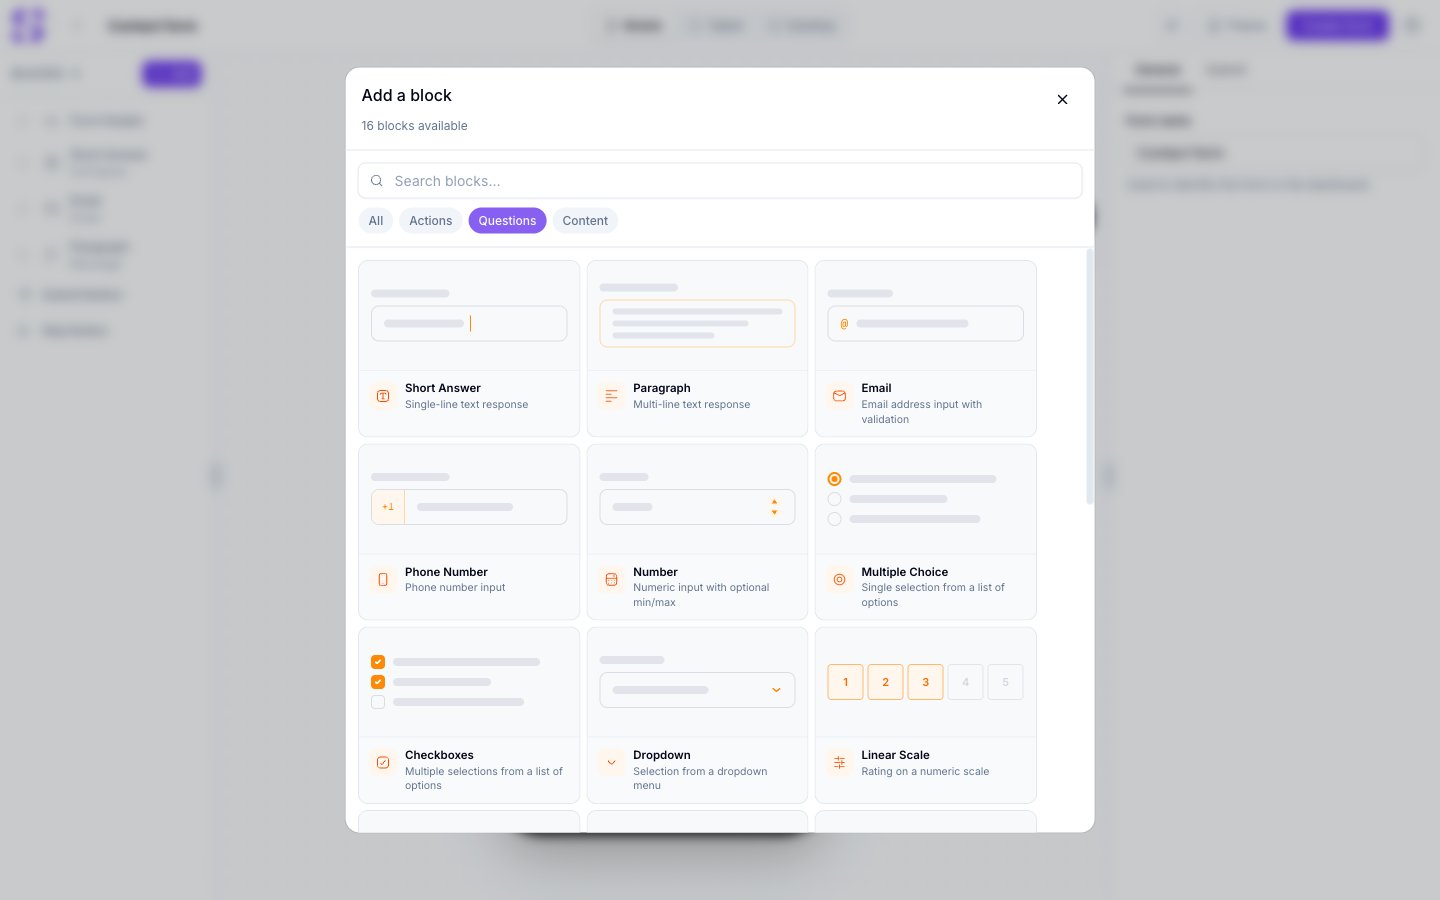
The picker groups blocks into four tabs — All, Actions, Questions, and Content — and reports how many are still available to add (form-level blocks like Form Header, Submit Button, and Skip Button can only be added once each, so they drop out of the count once used).
The Add a block picker, filtered to the Questions tab
The Content tab has one additional non-question block, Description — a rich-text paragraph with formatting, links, and images, for adding instructions or context between questions.
Configure After submission behavior (show a message or redirect to a URL) and a Send responses to email address for notifications.
The Submit and Skip button labels are not set here. Select the button block on the canvas to change its label and style, and add or remove the Skip button from the block picker.
There is no separate “Skip” tab in form settings. Skip is a canvas block, not a settings toggle — see Skip button & form gates.
Changes auto-save as you edit — the header shows a live Saving…/Saved indicator. The primary header button reads Create Form before the form’s first save, and updates to Update Form afterward.
A form only starts collecting responses once it’s linked to a QR Code. Open the QR Code’s Settings tab and turn on Capture Leads, then choose Capture using Forms and link your form. The Skip button & form gates page covers this flow — including the display style, timing, and expiry rules — in detail.