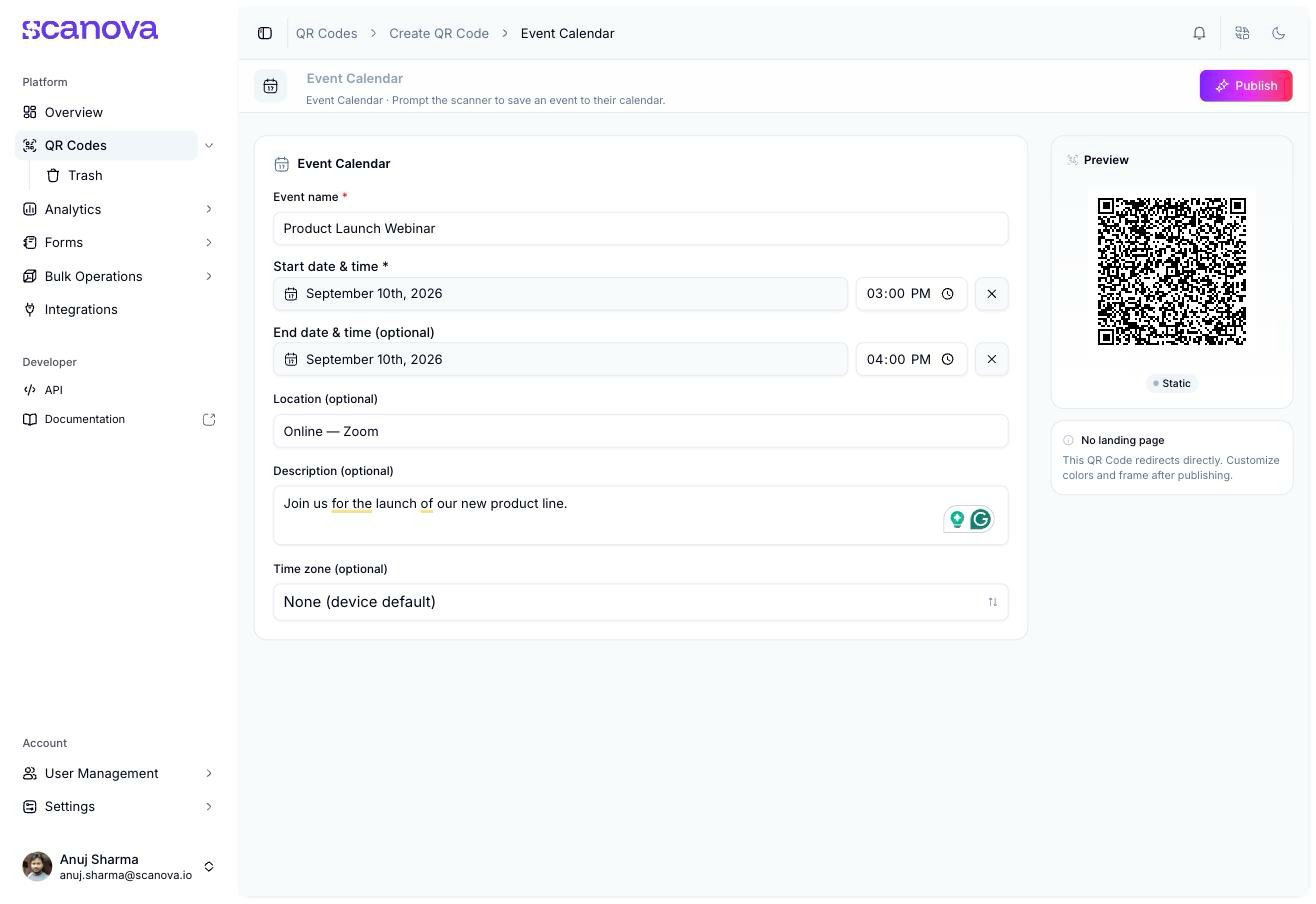
Create an Event Calendar QR Code that prompts the scanner to save an event, with its name, start and end times, location, and description all attached.
A Calendar Event QR Code prompts the scanning device to save an event straight into its calendar app — with the name, time, location, and description already filled in. It’s a Quick Code — a direct-action QR Code with no landing page. In the app, the tile for it reads “Prompt the scanner to save an event to their calendar,” and the tile is labeled Event Calendar (the underlying category name is “Calendar Event” — both refer to the same type).
Calendar Event is Static only — there’s no Dynamic option for this type. Once published, the encoded event can’t be edited or tracked; to change it, create a new QR Code.
Time zone — optional, defaults to “None (device default)” (the scanner’s own device time zone)
The Event Calendar Quick Code form with an event name, start/end time, location, and description entered
4
Publish
Click Publish. A panel opens to confirm or rename the QR Code (it defaults to the event name), assign a folder or tags, and adjust QR Code design before confirming. Once published, you can revisit design (colors, frame) from Edit Design on the confirmation screen.
To create a Calendar Event QR Code through the API rather than the UI, use category ID 12 (labeled Calendar Event, allowed_qr_types: "st" — only "st" is valid for qr_type), with an info payload shaped like:
{ "type": "calendar", "data": { "name": "Product Launch Webinar", "startDate": "2026-09-10T15:00", "endDate": "2026-09-10T16:00", "location": "Online — Zoom", "description": "Join us for the launch of our new product line.", "timeZone": "Asia/Kolkata" }}
Only name and startDate are required by the backend schema; both date fields are free-form strings with no enforced format — the dashboard form sends its datetime-local input’s raw value (YYYY-MM-DDTHH:mm) as shown above.
Category ID 12 (“Calendar Event”) is distinct from category ID 20 (“Event”), which is a different, page-builder category — don’t confuse the two.
The Category List reference table doesn’t currently list Calendar Event (or the other Quick Code–only categories on this page) — the ID above was confirmed directly against the live /qr/category/ endpoint.