

/users/user-logs) generates a downloadable CSV of your team’s activity for a time period you choose, emailed to you once it’s ready. It sits alongside Roles and Activity under User Management in the sidebar — all three only appear for accounts with the right plan and permissions.
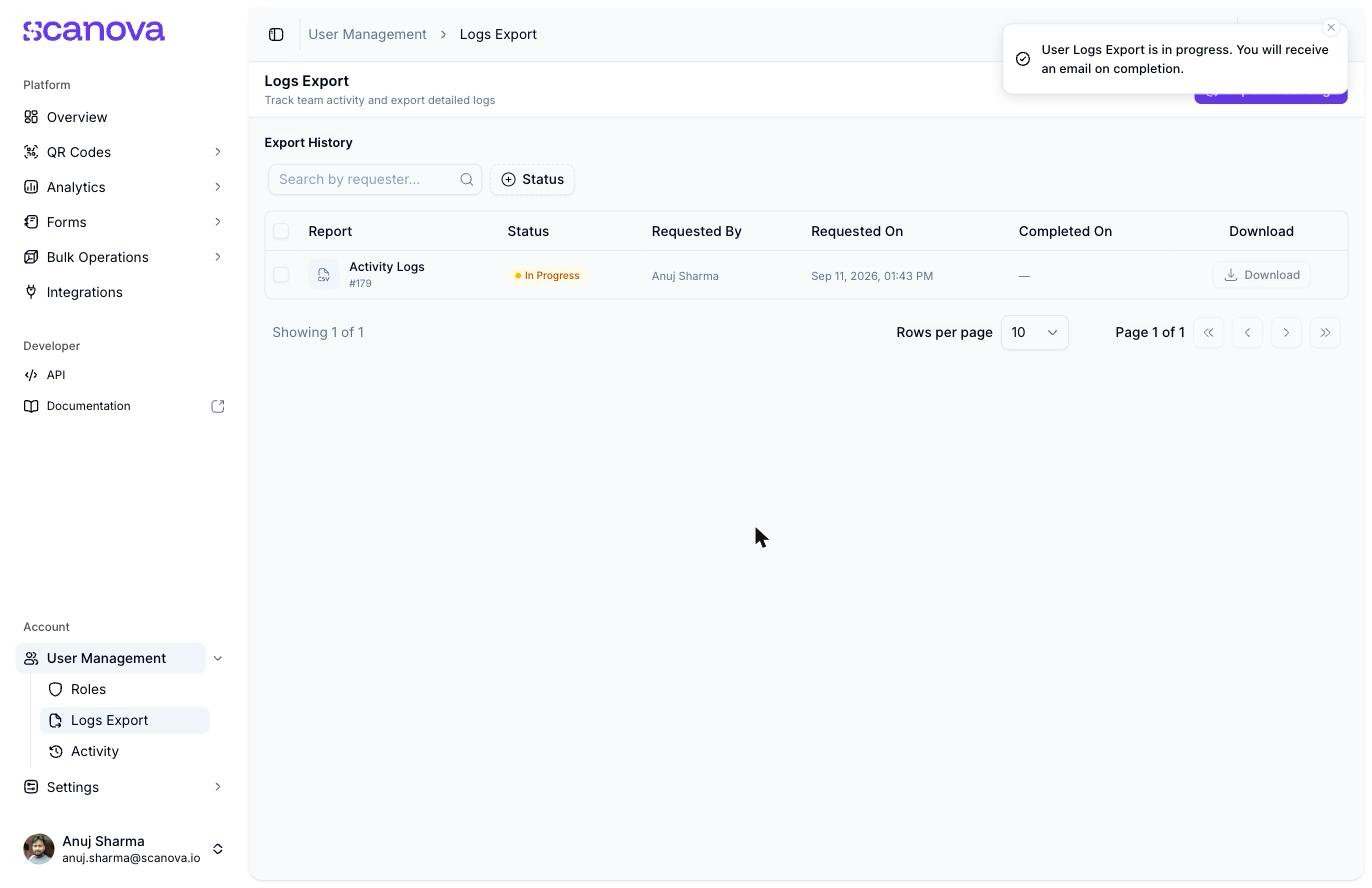
The Logs Export page, right after requesting an export
Requesting an export
1
Open the export dialog
Select Export User Logs in the page header.
2
Choose a time period
Under Select Time Period, choose Last 7 Days, Last 30 Days, Last 90 Days, Last 180 Days, or Custom for a specific date range.
3
Start the export
Select Export Logs. A toast confirms: “User Logs Export is in progress. You will receive an email on completion.” The request appears immediately in Export History below, named Activity Logs, with a status of In Progress.
The Select Time Period dropdown’s options exist in the page but don’t render visibly when you click it — a rendering issue this docs pass also found on several other pages’ popups (dropdowns, date pickers). If the list doesn’t appear, try a different browser or zoom level, or reload and try again.
Export History
Every requested export is tracked in a table:
Filter the table with the Search by requester box or the Status filter (Completed / In Progress / Failed).
Related
- Activity — the live feed and trends this export’s underlying data is drawn from
- Shared users — inviting the teammates whose activity shows up here
- Roles & permissions — what each role can see and do, including whether they can request an export