Create a QR Code that redirects to any web address, as a Dynamic code you can edit and track after printing, or as a Static code that encodes the link.
A Website URL QR Code redirects anyone who scans it straight to a web address — a landing page, a product listing, a menu hosted elsewhere, anything with a URL. It’s the simplest Quick Code: no landing page is built, the QR Code just encodes (or, for a Dynamic code, redirects to) the link you provide.
This is a Quick Code — a direct-action QR Code with no landing page, distinct from Build a Page (the block-based landing page builder). See Quick Code vs. full Page for when to use which.
From the sidebar, go to QR Codes, then click Create QR Code (or navigate to /qr/create). Click the Quick Code card — described as “Direct-action QR Codes for Website URL, Map (Google & OpenStreet), App Store, Deep Link, and GS1, plus static-only types like phone, email, and Wi-Fi. No landing page needed.”
2
Pick Website URL
On the Quick Code type grid, click Configure under Website URL, in the Dynamic section at the top. This opens the form at /qr/quick/url.
3
Enter the URL
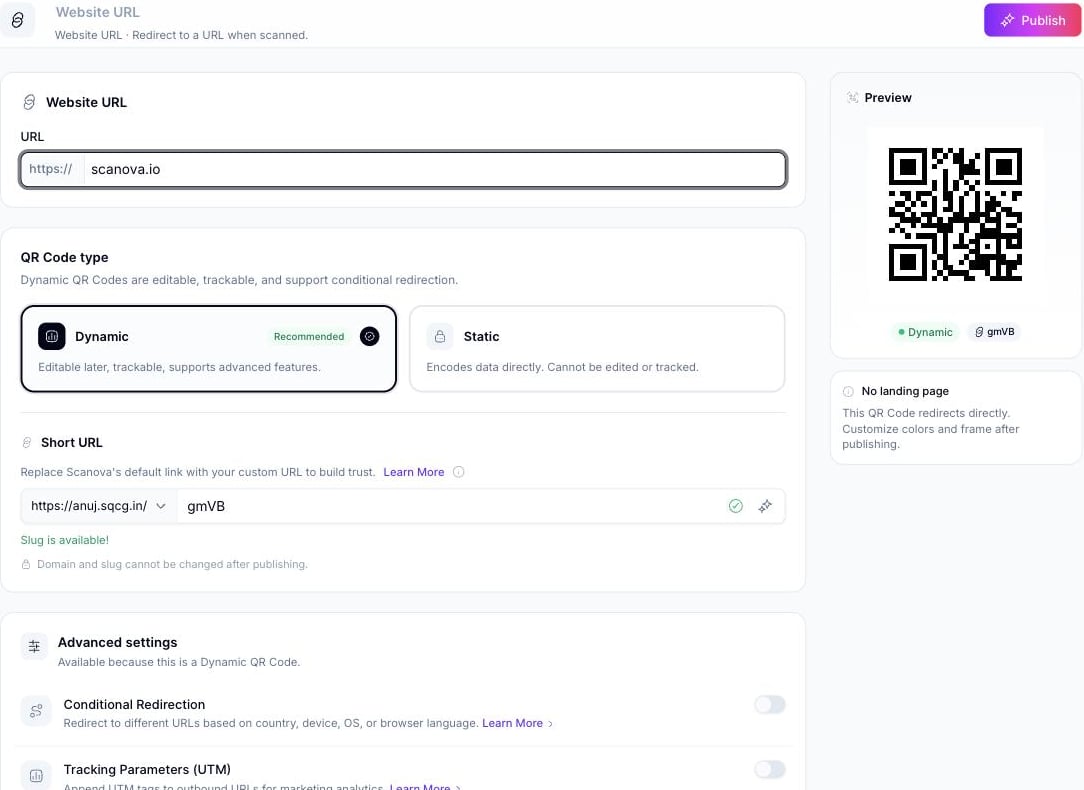
Type the destination address into the URL field. The input has a fixed https:// prefix, so you only need to enter the rest (e.g. example.com) — the placeholder shows example.com. An invalid or empty URL blocks publishing.
The Website URL Quick Code form with a URL entered
4
Choose Dynamic or Static
Website URL is the one Quick Code type that supports both Dynamic (editable later, trackable, supports Conditional Redirection and UTM tracking) and Static (encodes the URL directly; can’t be edited or tracked after publishing) — every other Quick Code type on this page is Static only. Dynamic is selected and recommended by default.If you keep Dynamic, a Short URL section appears where you can set a slug (or a custom domain, if configured) — a slug is required before a Dynamic code can be published.
5
Publish
Click Publish in the top-right. A panel opens where you can confirm or rename the QR Code (it defaults to “Your QR Code”, so rename it here if you want something more specific), assign a folder or tags, and adjust QR Code design before confirming.
To create a Website URL QR Code through the API rather than the UI, use category ID 1 (labeled Website URL, allowed_qr_types: "bt" — it accepts both "dy" and "st" for qr_type), with an info payload shaped like: